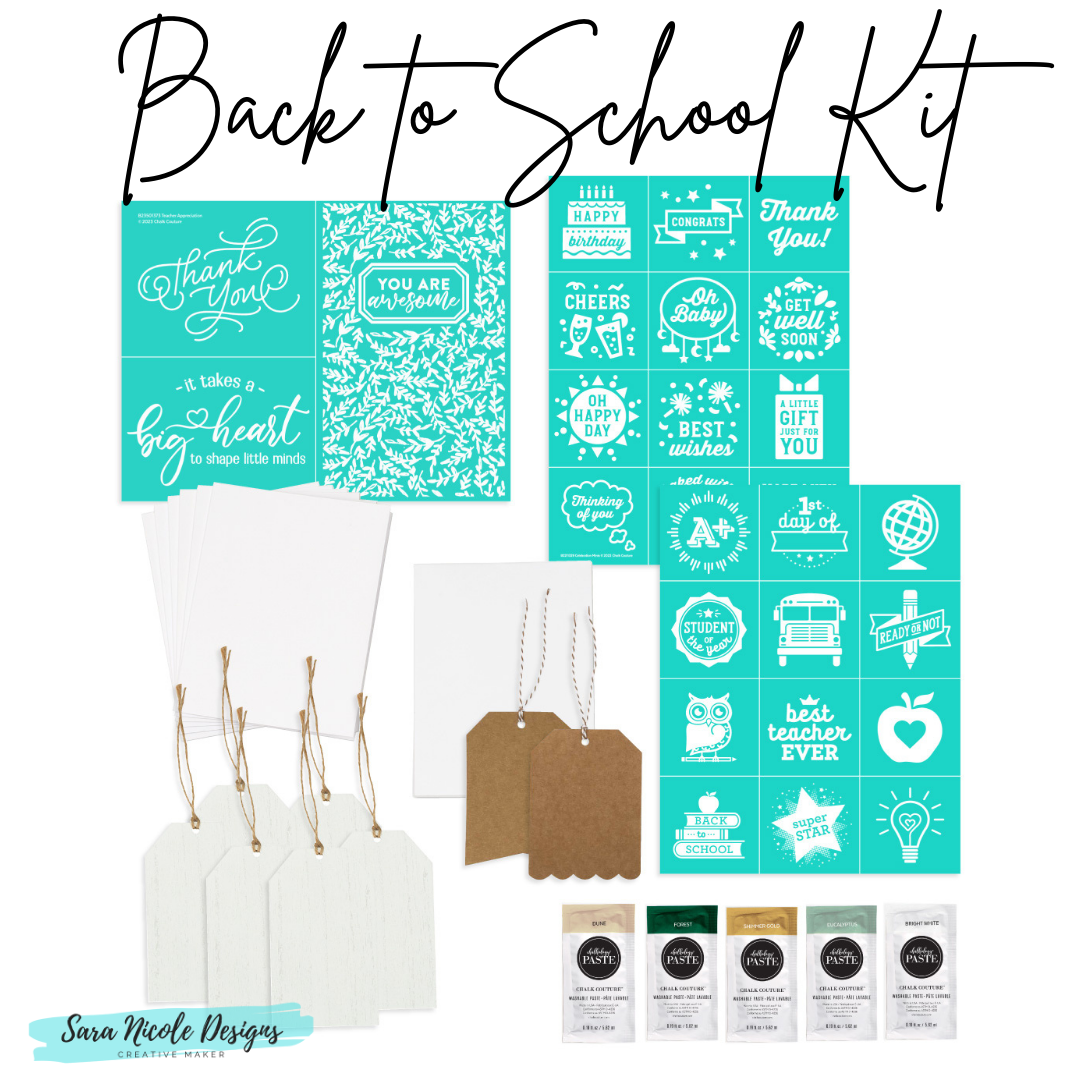
It’s nearly time to send the kiddos back to school! Show some love to our amazing educators with a kit that will have you prepped and ready for teacher gifts and thank-you notes. Because they deserve it!
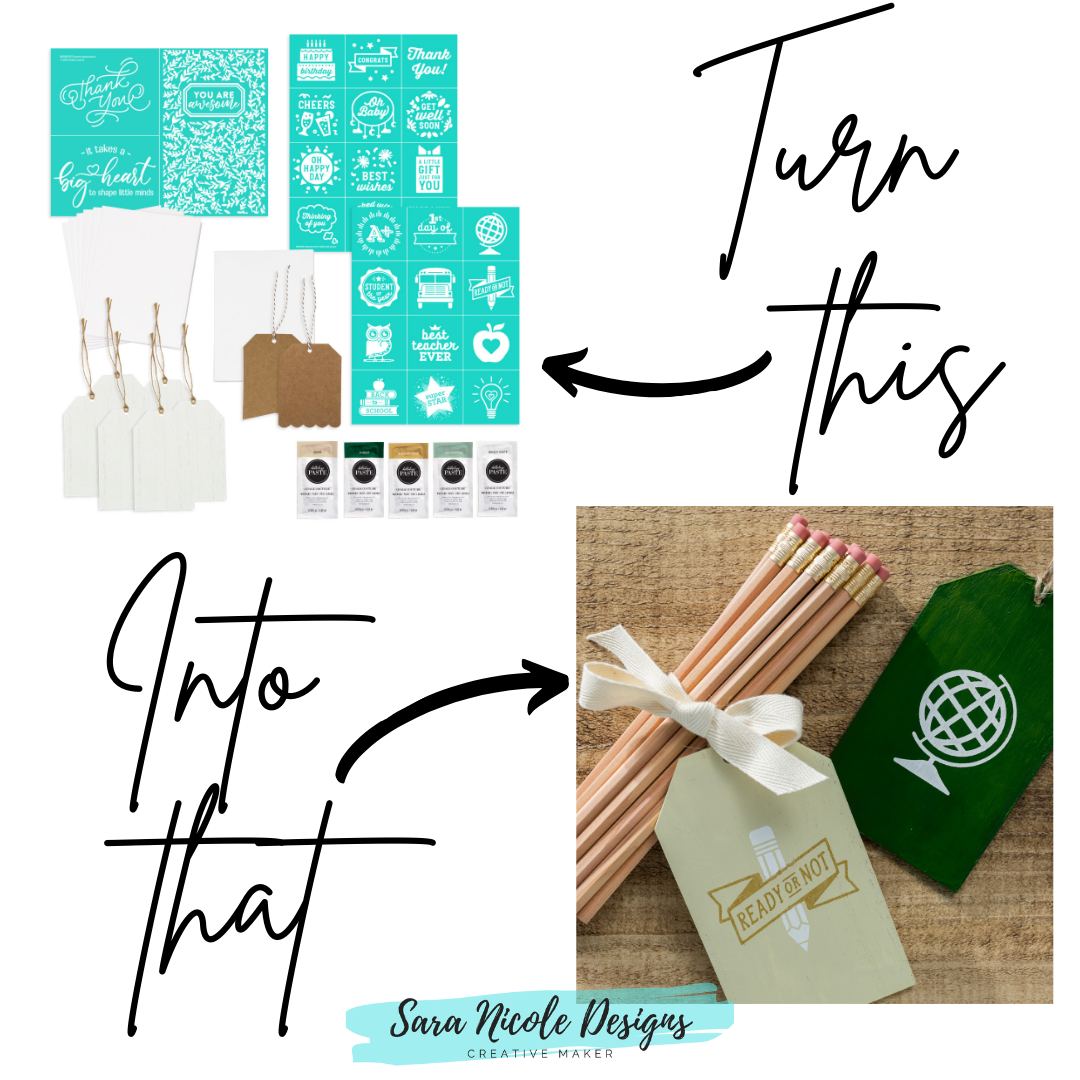
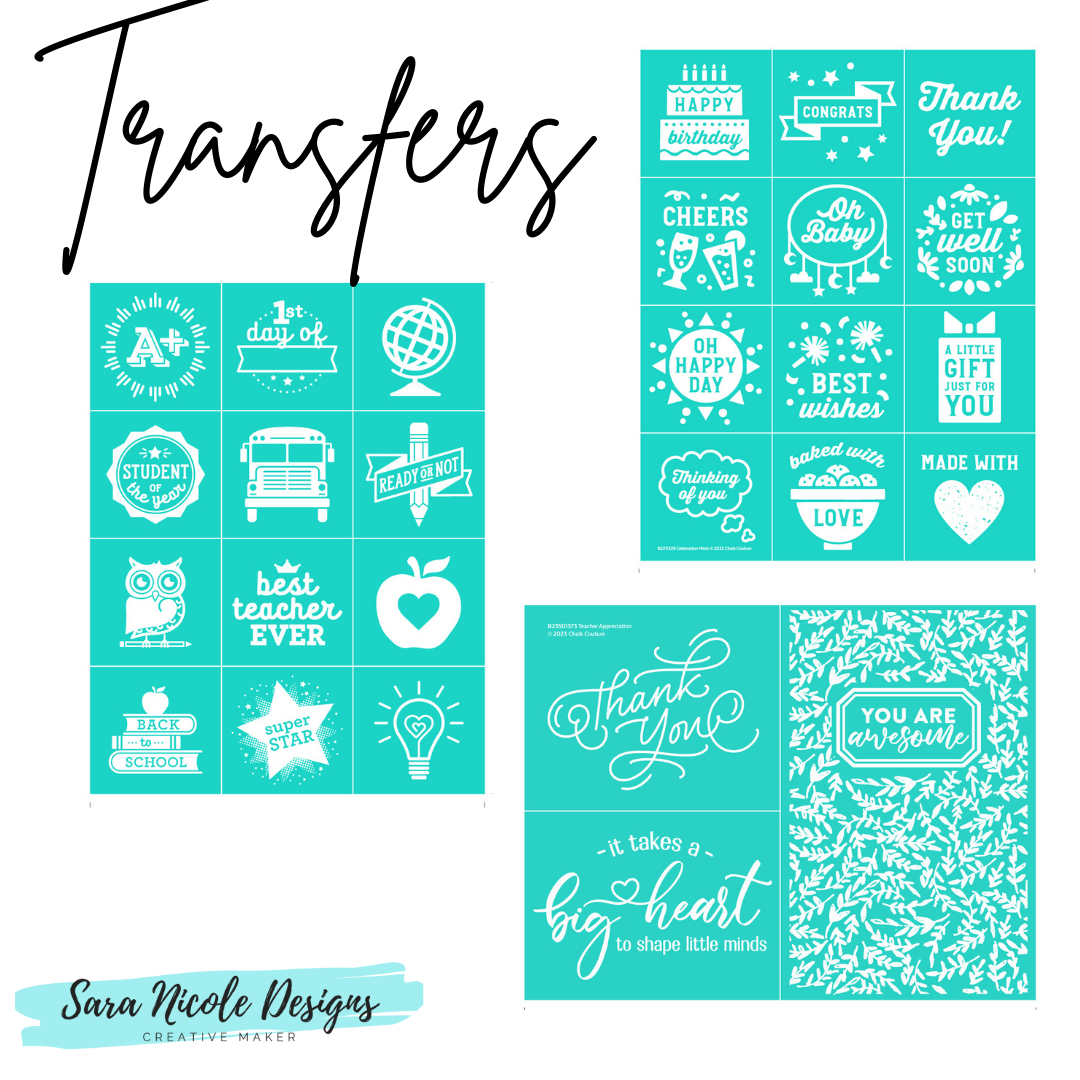
This kit is over 30% off and includes the following: Teacher Appreciation, Back to School Minis, and Celebration Minis Chalk Transfer® designs; 2 ChalkSuede™ Foldover Cards and Envelopes (8-Pack, 4¼" x 5½"); Tag Minis (6-Pack, 3" x 5"); ChalkSuede™ Gift Tags (Kraft, 12-Pack, 3" x 4"); and Chalkology® Paste Singles in Bright White, Dune, Eucalyptus, Forest, and Shimmer Gold.
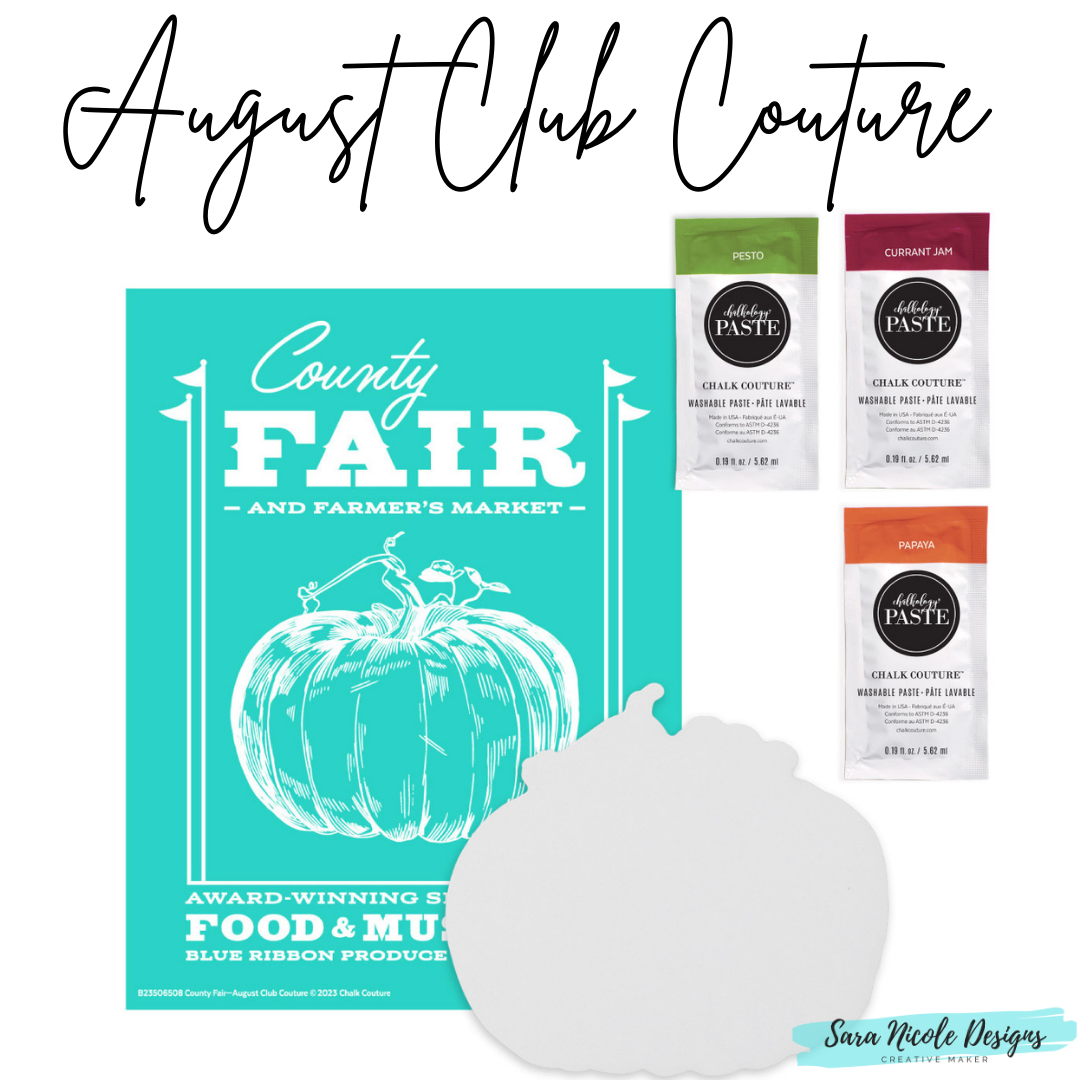
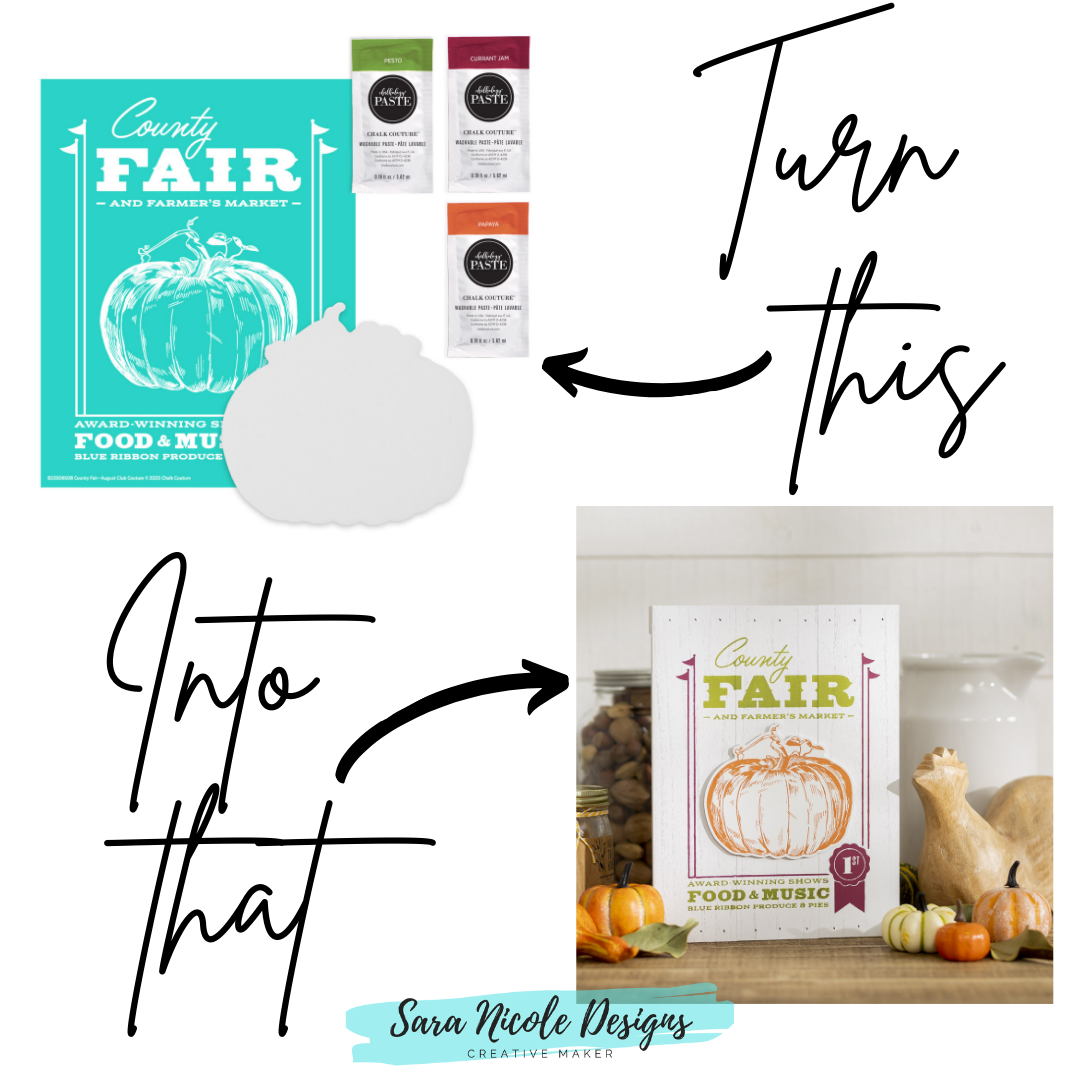
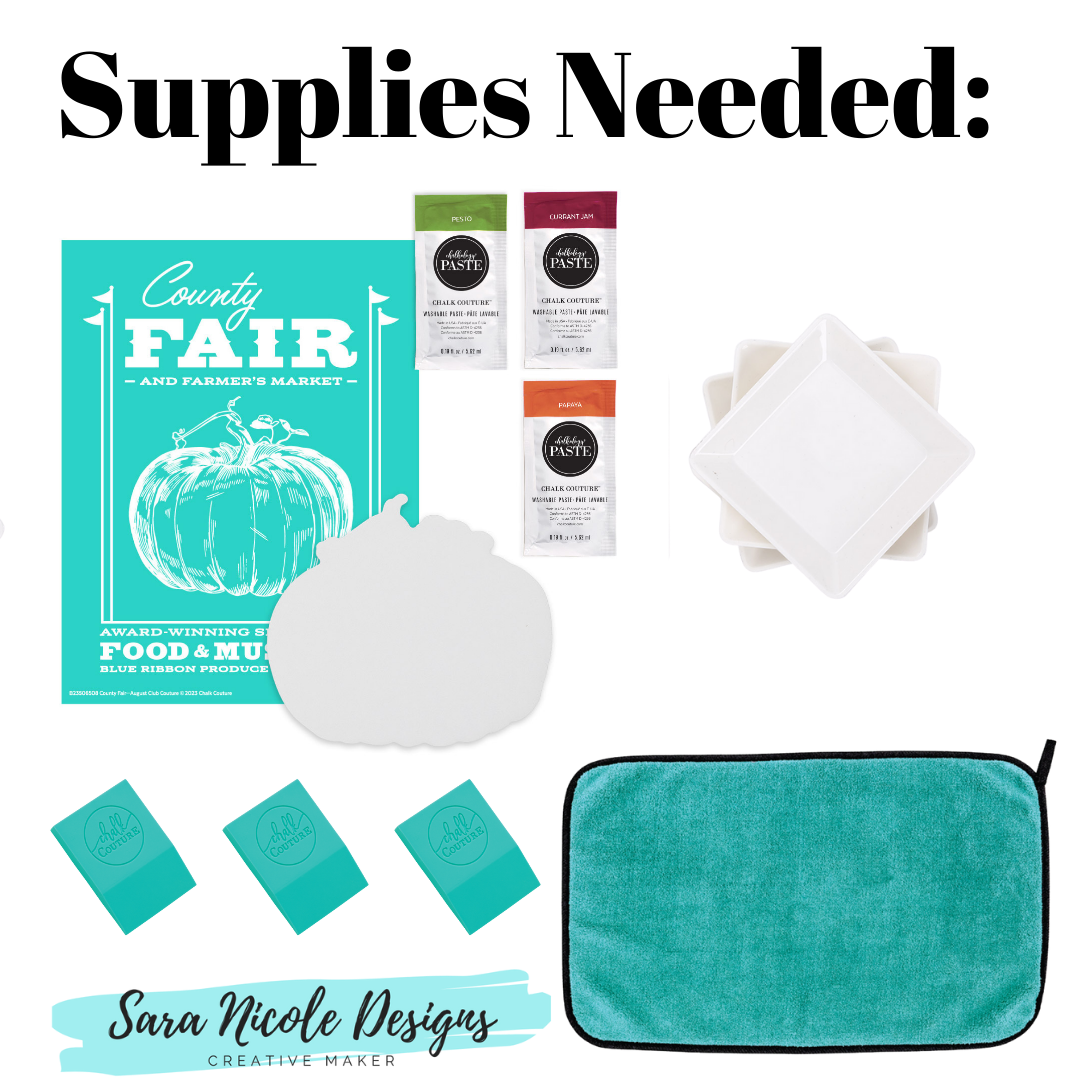
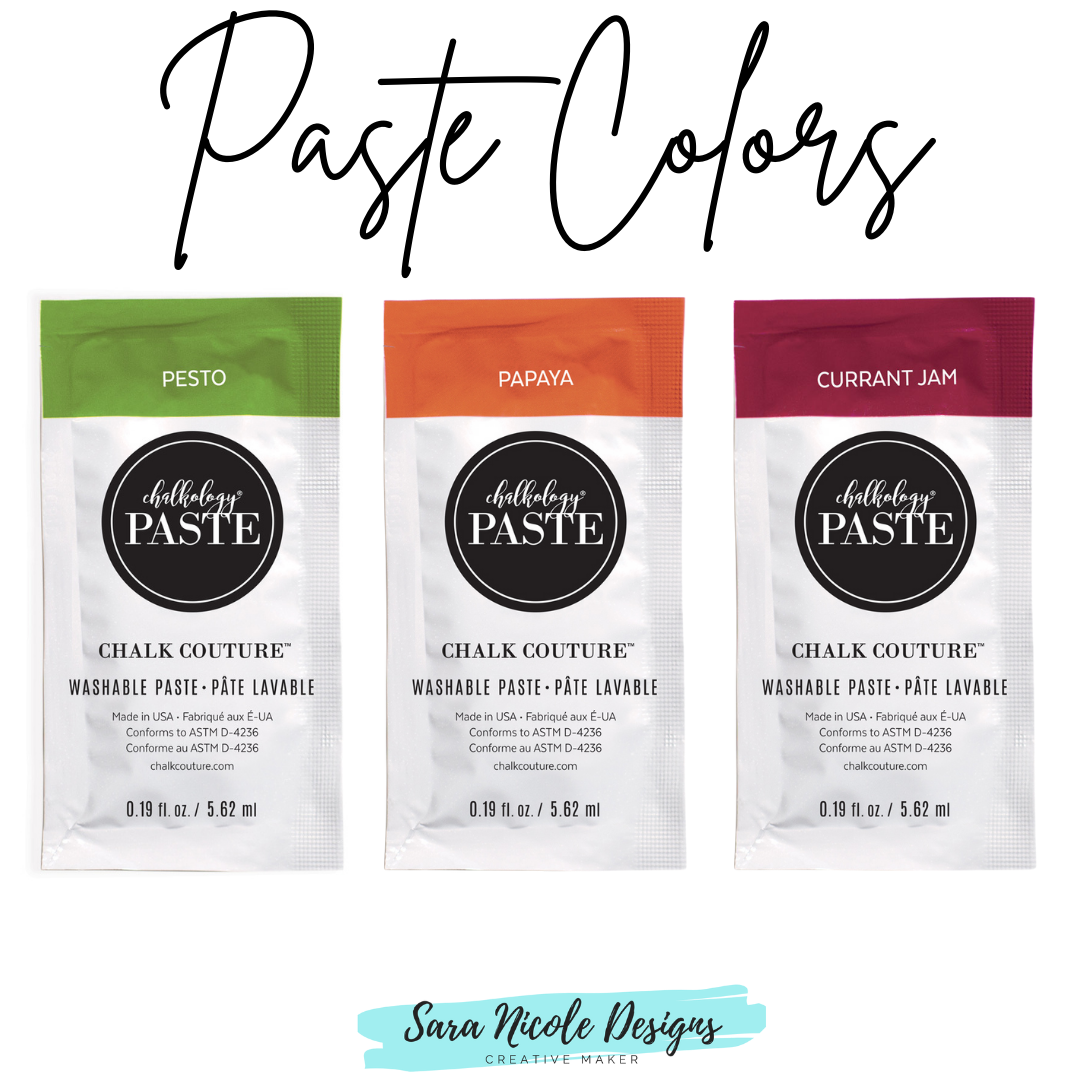
Create an award-winning project with the County Fair Chalk Transfer® design, using Currant Jam, Papaya, and Pesto Chalkology® Paste Singles. Give those farmer’s market judges pumpkin to talk about when you feature the new and exclusive, coordinating Chalkable Shape!
Did you see what's new with Club Couture?! Now with each month's transfer, you now get a chalkable shape that coordinates with the transfer. How cool is that!
Ready to make this month's Club Couture transfer? Follow along!
This August shipment includes Currant Jam, Papaya, and Pesto Chalkology® Paste Singles.
Follow these instructions to complete this project:
Remove the Transfer Backer Sheet and “fuzz” the Transfer on a Fuzzing Cloth. Center the Transfer on your Pallet Sign; smooth out the Transfer to ensure that it has properly adhered and there are no bubbles or wrinkles.
Knead your Chalkology Paste Singles. Cut the paste singles open and squeeze the desired amount of paste onto a Color Tray, using a new tray for each color.
For best results when applying paste, divide your project into sections and use the chalk-and-pull method. To perform this method, apply paste one section at a time (see “Color and Placement Suggestions”) using a squeegee. Once you have chalked a section, and before the paste dries, peel back the Transfer (without removing it from the surface completely) and let the paste dry before continuing. Use a Quick Dry Tool to expedite the drying process, then lay the Transfer back down over the chalked section.
Repeat steps as necessary, until the design has been completely chalked. Remove your Transfer from the surface and immediately clean the Transfer with cool water (do not let it soak). Dry the Transfer flat with the sticky side up.
Allow the Transfer to dry completely before using it again to apply paste to your Chalkable Shape.
Clean and care for the Transfer according to the instructions given in step 4. Once dry, reapply the Transfer Backer Sheet and store flat.
To add extra dimension to your project, use hot glue to adhere the Chalkable Shape to the Pallet Sign.
Our basic instructions go like this: choose a surface and Transfer, add some paste or ink, and start creating. With the Best Basics Chalk It Up Kit, you’ll have what you need to carry out those instructions and you’ll be well on your way to artistry!
This kit includes two of our favorite surfaces: Board & Base (perfect for A-sized Transfers) and a Sylvie White Frame (perfect for B-sized Transfers). Both surfaces are reusable with Chalkology Paste, and can be used in either landscape or portrait orientation. Plus, that Board & Base is reversible so you can have two projects to display all at once!
Are you a pumpkin lover? I sure am! I buy as many pumpkins that I can fit on my porch!
Do you make stuff for your home? Let me know! I would love to hear all about it!