Showing posts with label December. Show all posts

Thursday, December 29, 2022

My 2022 Christmas 3 Tiered Tray - Let's decorate! // Come see how I decorated it this Christmas!

I love Christmas time. It's one of my favorite holidays. But I feel that I really don't get to put too much time decorating as much as I would like due to working so many hours at UPS. But with 17 Peak's under my belt at UPS, I know how it goes. So I feel that this years Christmas 3 Tiered Tray was the last to finish while decorating. Every time I did the dishes, I would look over and tell my self to finish it up, but I didn't have the energy or the creative spark to do it. It also didn't help that we had our upstairs bathroom leak into our kitchen like a waterfall. But a few days before Christmas, I finally got it all together. 
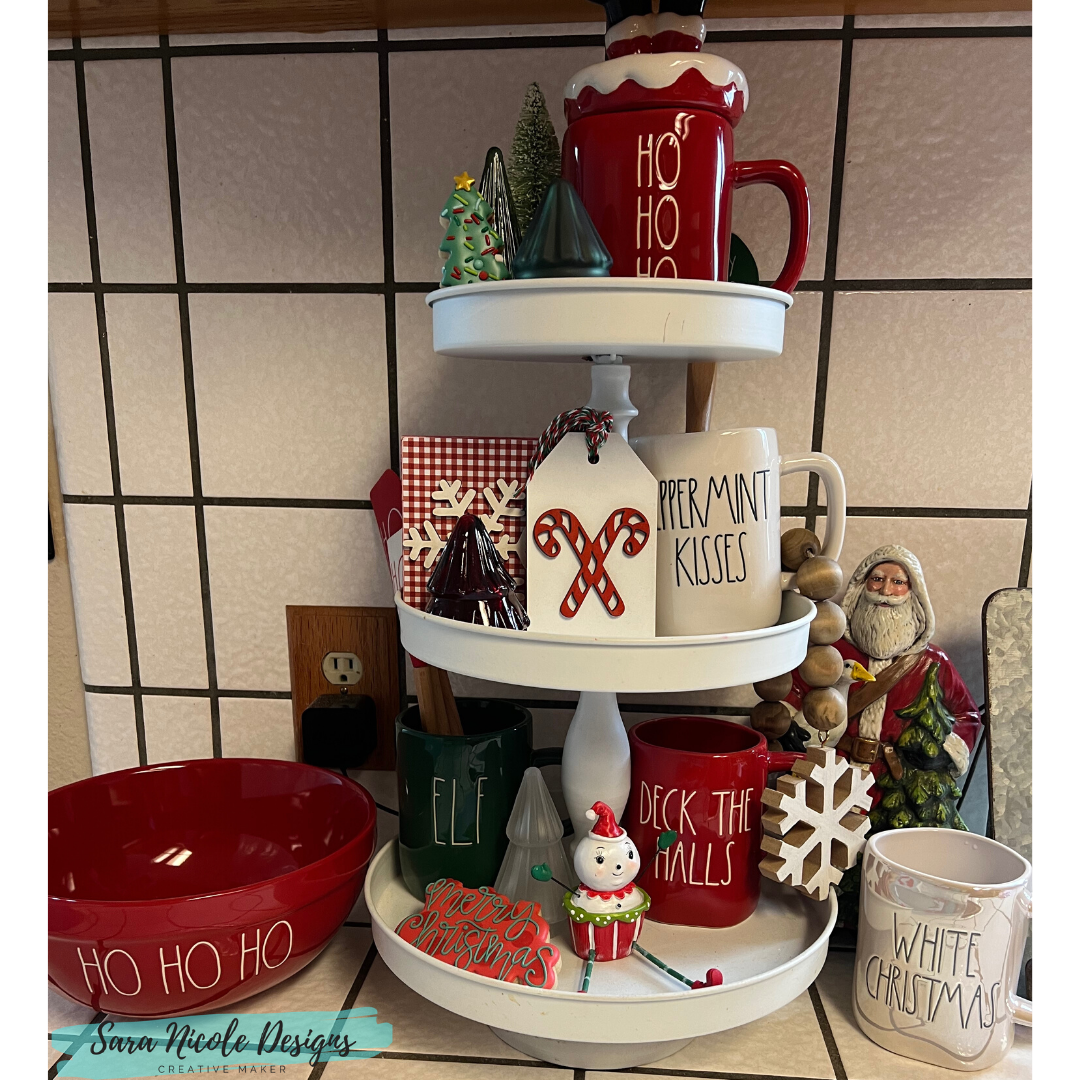
Top Tier


Starting from the left is a little collection of Christmas Trees. The glass trees I got in the Target Dollar section last year. Then there is a bottle brush tree that I also bought at Target last year. My favorite tree in this collection is a cookie from my friend Katie from Bee Love Cookie Co. She makes the BEST cookies! On the right, is my new Rae Dunn Ho Ho Ho Santa Topper Mug that I bought this year at Marshalls. 

Middle Tier


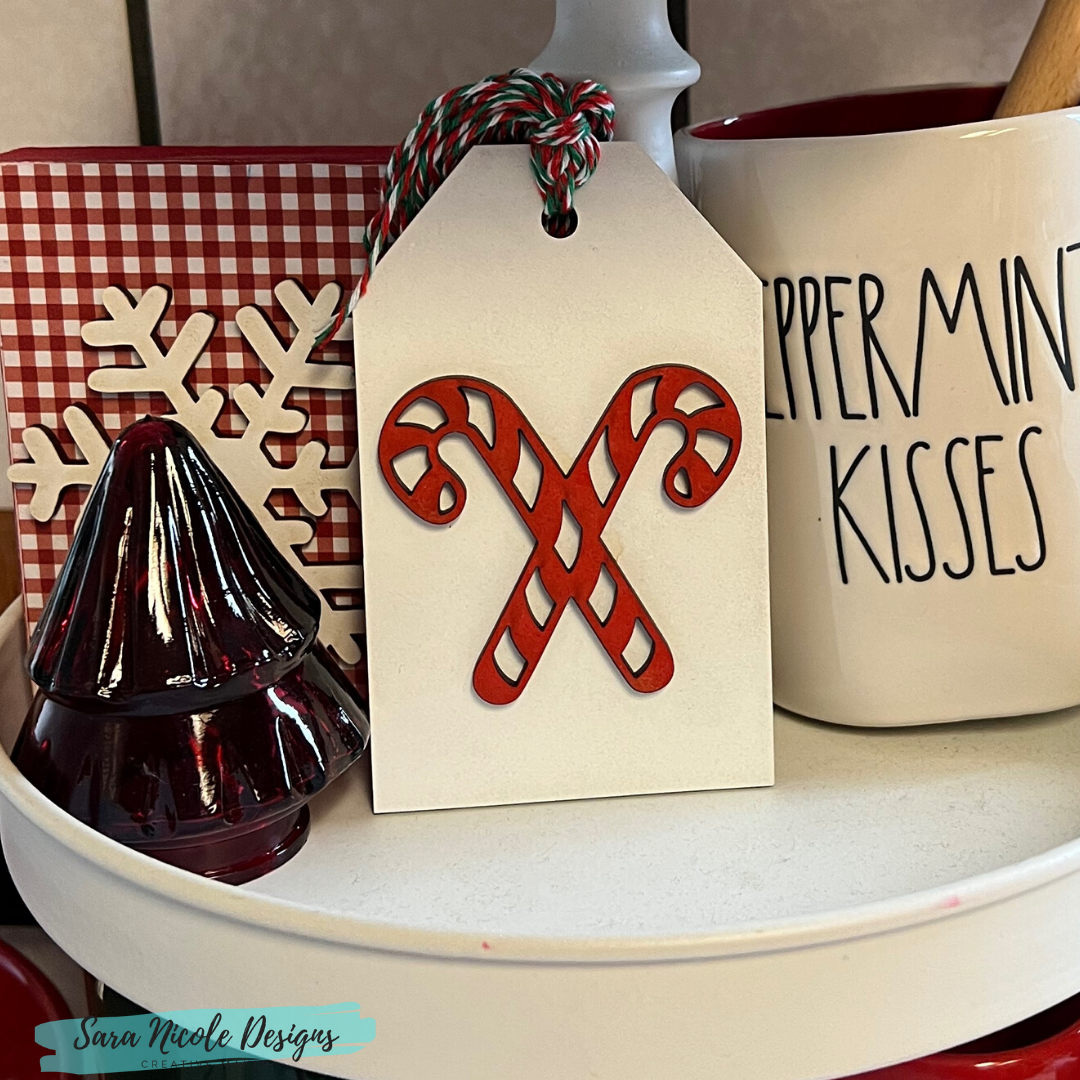
From the left in the back is a snowflake decorative block that I made last Christmas time. In front of that is a red glass Christmas tree from the Target Dollar Section. In the middle is a candy cane tag that I made last year. On the right is my Rae Dunn Peppermint Kisses Mug that I think I got from Marshalls this year. Inside the mug is a Rae Dunn green Merry Xmas Spatula that I got from Marshalls. Hanging from the mug handle is a snowflake short wooden garland from Hobby Lobby. 

Bottom Tier

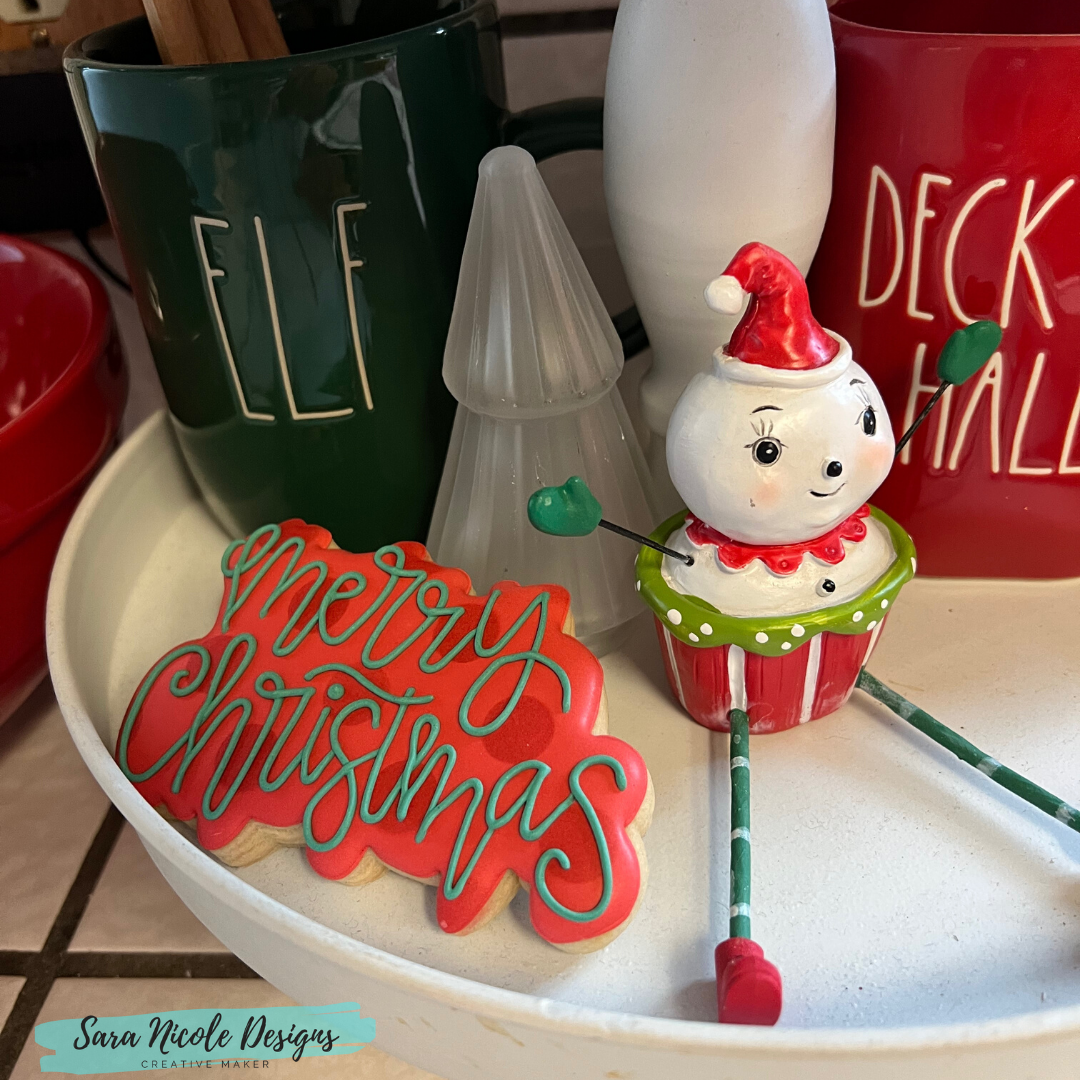
From the left is my green Rae Dunn Elf Mug that I bought from Marshalls. Inside are some more small Rae Dunn Christmas spatulas. Next to the Mug is another clear glass Christmas tree from the Target Dollar section.  In from of the clear tree is another amazing Merry Christmas Cookie from Bee Love Cookie Co. In the middle is a Joanna Parker Snowman shelf sitter that I bought from Marshalls last year. On the right is a red Rae Dunn Deck the Halls mug that I bought last year at Marshalls. 

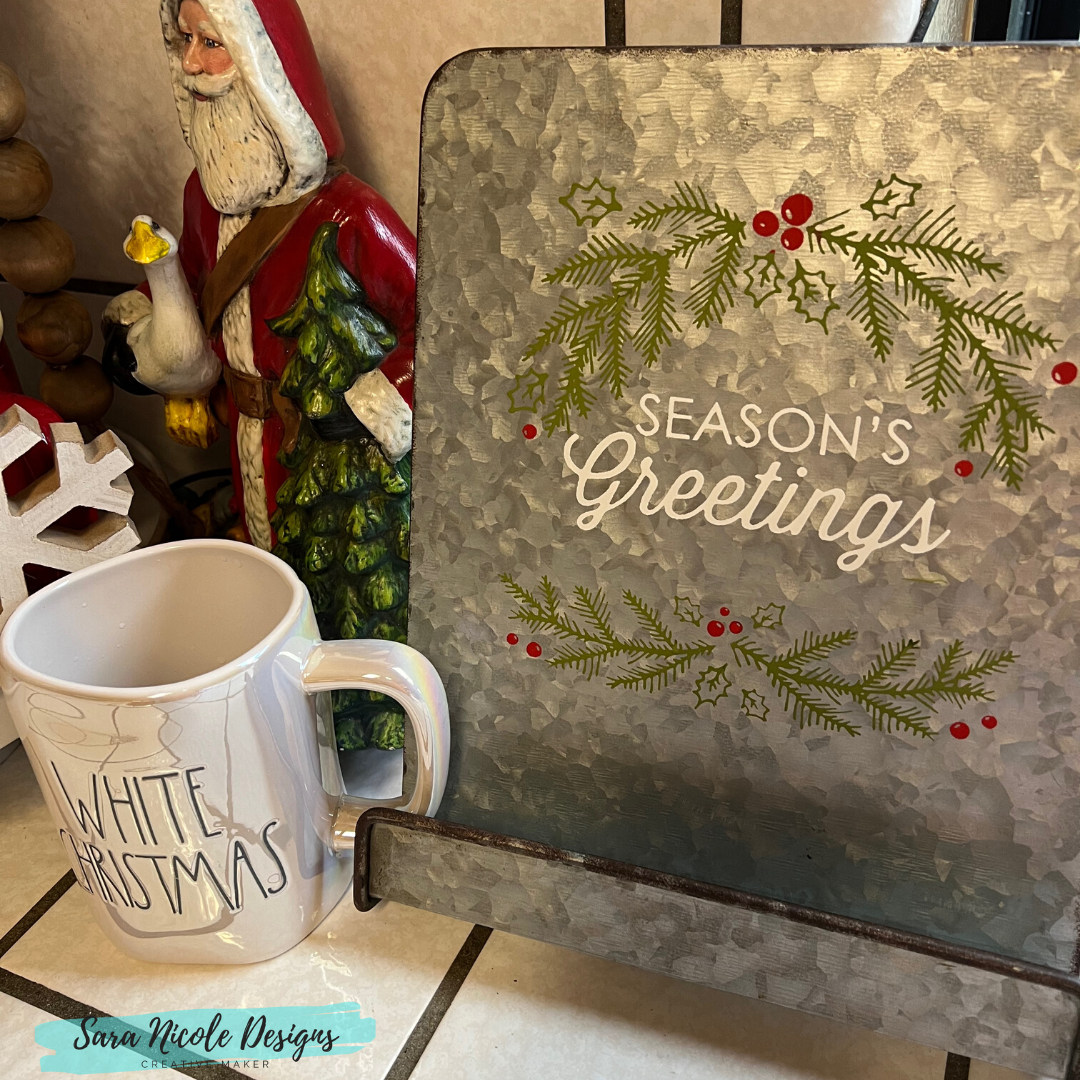
Next to 3 Tiered Tray 
 
On the left of the 3 Tiered Tray is my Red Rae Dunn Ho Ho Ho Glass Bowl from Marshalls.  On the Right is a Santa Claus, Iridescent Rae Dunn White Christmas Mug and a Season's Greeting Tablet holder that I made last year. This Santa is so special to me- It's was actually a musical status that was hand painted by my Grandma. My Grandma, Verleen, was the most amazing artist who could create anything. I am so thankful that I have some of her pieces that she made.  

What is your favorite piece on the 3 tiered tray? I really love them all this year! 
 
 Do you make stuff for your home? Let me know! I would love to hear all about it! 

LET'S BE FRIENDS ON SOCIAL MEDIA:  
Find me on Instagram: https://bit.ly/2QTKYg4
Find me on Pinterest: https://bit.ly/3iaX94p
Find me on Facebook: https://bit.ly/3hYyoZ0
Join my VIP Group: https://bit.ly/2QPLgEV

What Is Chalk Couture?: https://youtu.be/nyosBF7gSxo
See how to create with Chalk Couture: https://youtu.be/jHLd2P2zqWo

SAVE 40% OFF EVERYTHING & JOIN MY TEAM AS A DESIGNER: 
What Is In The Kit: https://youtu.be/qiVdqk2RDdw

JOIN MY CLUB COUTURE & GET EXCLUSIVE PERKS: 
EXCLUSIVE DISCOUNT: 25% OFF, Happy Mail, Exclusive Lives, Art Giveaways, and other benefits


Like these but not sure what Chalk Couture is- Click here to read all about it! 

Wanna shop for some Chalk Couture stuff? Click here to check out all the amazing items! 

And as always, help a sister out by sharing this post, like it and leave me a comment! 

Until then...

Wednesday, December 1, 2021

December Club Couture - Good Things // Come Chalk with Me!


The December 2021 Club Couture™ Transfer is a great way to kick off your new year, sending vibes for good things to happen in 2022. For new chalkers and those who prefer a more simple project, this Chalk Transfer® design looks amazing chalked all in one color. For meticulous crafters and those who like to take things above and beyond, it’s a great chance to show off detail work, adding different hues to the design.

We’re showing off a bit here with a busier design; make it pop with a surface sized to allow a bit of empty space in the border around it. We’ve chosen to add our old staple Bright White (item P181121). The subscription includes Chalkology® Paste Singles in Couture Teal, Eucalyptus, and Peachy Keen, which can be used here or saved for future projects.

No matter how you chalk it, good things are going to happen!

Supplies Included

Club Couture Transfer: Good Things—December Club Couture Chalkology® Paste Singles: Couture Teal, Eucalyptus, Peachy Keen
Additional Supplies Needed

Surface: Sylvie White Frame (9" × 12") Chalkology® Paste: Bright White

Tools: Color Trays, Fuzzing Cloth, Detail Tool, Multi-Tool, Mini Squeegee

Color and Placement Suggestions

Bright White (additional paste): swirls, “good,” “things,” “happen” Eucalyptus: greenery, “are going to”
Peachy Keen: accent flowers, banner dashes


Follow these instructions to complete this project:

1. Remove your Transfer from its packaging and carefully peel off the Transfer Backer Sheet.

2. “Fuzz” the Transfer by gently pressing onto a Fuzzing Cloth and carefully pulling it upward. This will make the Transfer easier to remove from the surface after you’ve applied the paste.

3. Center the Good Things Transfer on the surface and smooth it out to ensure it has properly adhered and that there are no bubbles or wrinkles.

4. Knead your Chalkology Paste Singles. Cut open the corner of each packet and squeeze the desired amount of paste onto a Color Tray, using a new tray for each color.

5. With the curved edge of your Multi-Tool, thoroughly mix your jar of Bright White Chalkology Paste and scrape excess paste from the jar sides.

6. Use your Mini Squeegee, Multi-Tool, and Detail Tool to apply color over your Transfer (see “Color and Placement Suggestions”). Select your tool based on whichever size best fits the various Transfer elements. Once the screen portions of the design are completely covered, use your tools to remove excess paste as evenly as possible; excess paste can be scraped back into the tray or jar. The more excess paste you remove, the better the result will be.

7. For best results, divide your project into sections and use the chalk-and-pull method. This allows you to work in smaller sections without having the paste dry in the screen, which would give you patchy results. Chalk the top section of the design and peel back only that portion of the Transfer to let the paste dry on the surface before continuing (use the Quick Dry Tool for a fast dry). To prevent any stretching in the Transfer, peel from the center or from both corners, instead of peeling diagonally.

8. Gently lay the Transfer back down over the chalked section. Ensure that the next section is fully adhered, and repeat these steps as you work your way down the Transfer.

9. Once your design is fully chalked and before the paste dries, remove your Transfer from the surface and immediately clean the Transfer with cool water (do not let it soak).

10. Dry the Transfer flat with the sticky side up. Once completely dry, reapply the Transfer Backer Sheet and store flat.

11. Show off your latest DIY project to friends and family. And remember, good things are going to happen!

Want to see a quick Video on how it is done? 

Watch this:

Not a Club Member yet?

Love your Club Couture membership, but want more to use them on? Get a Best Basics Chalk It Up Kit

Our basic instructions go like this: choose a surface and Transfer, add some paste or ink, and start creating. With the Best Basics Chalk It Up Kit, you’ll have what you need to carry out those instructions and you’ll be well on your way to artistry!

This kit includes two of our favorite surfaces: Board & Base (perfect for A-sized Transfers) and a Sylvie White Frame (perfect for B-sized Transfers). Both surfaces are reusable with Chalkology Paste, and can be used in either landscape or portrait orientation. Plus, that Board & Base is reversible so you can have two projects to display all at once!

Are you ready for a new year? I know I am! Let's hope for the best year yet! 

 Do you make stuff for your home? Let me know! I would love to hear all about it! 

What Is Chalk Couture?: https://youtu.be/nyosBF7gSxo
See how to create with Chalk Couture: https://youtu.be/jHLd2P2zqWo

SAVE 40% OFF EVERYTHING & JOIN MY TEAM AS A DESIGNER: 
What Is In The Kit: https://youtu.be/qiVdqk2RDdw

JOIN MY CLUB COUTURE & GET EXCLUSIVE PERKS: 
EXCLUSIVE DISCOUNT: 25% OFF, Happy Mail, Exclusive Lives, Art Giveaways, and other benefits


Like these but not sure what Chalk Couture is- Click here to read all about it! 


Wanna shop for some Chalk Couture stuff? Click here to check out all the amazing items! 


And as always, help a sister out by sharing this post, like it and leave me a comment! 

Until then...


Wednesday, December 9, 2020

December Club Couture - Welcome


Welcome to Club Couture! We hope you feel the warmth and kindness of this month’s Transfer. There are so many ways you can use this! Swap out the “o” in “Welcome” with the floral image, accent with additional foliage as desired, or vary your surface to best fit the space that calls to you. This month’s Club Couture subscription includes Chalkology Paste singles in warm tones—Storm, Guava, and Peachy Keen—but we can picture you using another mixture of colors for any sass, spunk, or class you want to add.


Supplies Needed


Club Couture Transfer: Welcome

Surface: Double-Sided Box Frame (6" × 18")

Chalkology Paste Singles: Guava, Peachy Keen, Storm

Tools: Multi-Tool, Small Squeegee, Transfer Trimmers, Color Trays, Fuzzing Cloth, Placement Tape

Color and Placement Suggestions

Storm: Letters and accent foliage Guava: Large flower
Peachy Keen: Flower center

Follow these instructions to complete this project:

1. Remove your Transfer from its packaging.

2. Cut along the Transfer’s provided cut lines to separate the elements.

3. Carefully peel off the Transfer Backer Sheet of the element you’re using first.

4. “Fuzz” the Transfer element by gently pressing onto a Fuzzing Cloth and carefully pulling it upward to collect a bit of lint (this helps to more easily remove the Transfer from the surface after you’ve applied the paste.

5. Centering top to bottom, position the “WELCO” part of the Transfer near the left side of the board, and the “ME” near the right side; leave sufficient space between the Transfer pieces to use the floral image in place of the “O”. Smooth out each element to adhere, ensuring there are no bubbles.

6. Knead each Chalkology Paste Single, open the corner, and squeeze the desired amount onto a Color Tray, using a new tray for each color.

7. Use a generous amount of Chalkology Paste on your squeegee and smooth it over each letter of the Transfer, skipping the “O” in “Welcome” (see “Color and Placement Suggestions”).

8. Once the screen portion of the design is completely covered, squeegee the excess paste off as evenly as possible and scrape it back into the tray. The more excess paste you remove, the better the result will be.

9. Before the paste dries, slowly peel back the Transfer. To prevent any stretching in the Transfer, peel from two corners instead of peeling diagonally. Immediately clean the Transfer with cool water (do not let it soak).

10. Dry the Transfer flat with the sticky side up.

11. Once those chalked sections are dry, repeat steps 3–5 and 7–10 for the flower. Let the flower dry completely, then repeat for the flower’s center and the foliage piece (placing the foliage on the bottom right-hand side of the flower). When chalking the foliage piece, it may be helpful to cover the floral image with Placement Tape to keep from getting additional paste on your floral image (if pasted as we’ve shown, the foliage should appear as if it’s coming out from behind the flower).

12. Once all Transfer elements are washed and dried, reapply the Backer Sheet to each and store flat.

13. Relish your creation!

Love your Club Couture membership, but want more to use them on? Get a Kickstart kit

This kit has everything you need to make starting your creative adventure easy. Grab it now, because it's available at this price only with your initial Club Couture subscription. Small Squeegee Multi-Tool Board Eraser (2-Pack) Chalkology Paste Bright White (3 oz.) Couture Gallery™ Board (9” x 12”) Couture Boutique Board & Base.

Who is ready for a new year!?! I know I am!
 Do you make stuff for your home? Let me know! I would love to hear all about it! 

What Is Chalk Couture?: https://youtu.be/nyosBF7gSxo
See how to create with Chalk Couture: https://youtu.be/jHLd2P2zqWo

SAVE 40% OFF EVERYTHING & JOIN MY TEAM AS A DESIGNER: 
What Is In The Kit: https://youtu.be/qiVdqk2RDdw

JOIN MY CLUB COUTURE & GET EXCLUSIVE PERKS: 
EXCLUSIVE DISCOUNT: 25% OFF, Happy Mail, Exclusive Lives, Art Giveaways, and other benefits


Like these but not sure what Chalk Couture is- Click here to read all about it! 


Wanna shop for some Chalk Couture stuff? Click here to check out all the amazing items! 


And as always, help a sister out by sharing this post, like it and leave me a comment! 

Until then...

Google Analytics

AUTO ADS BODY