Saturday, June 26, 2021

DIY Easy Peasy Beach sign - make your own Home Decor in Minutes! // Come Chalk with Me!


I needed a smaller beachy sign for my 3 Tiered Tray, and I knew I could make one. But I didn't want to go buy anything, so I started searching around the house. I went outside to look through the scrap wood pile and found a perfect small. I sanded it just a tad, and then painted it white. 

After it was dry, I sanded the top and edges to give it a vintage vibe. Then I grab the Beach Vibes Transfer (retired), Shimmer Splash Chalk Paste, a Small Squeegee and a stir stick

Here's the Beach Vibes Transfer (Retired) That I used

Beach Vibes Chalk Transfer | Chalking With Jessica 

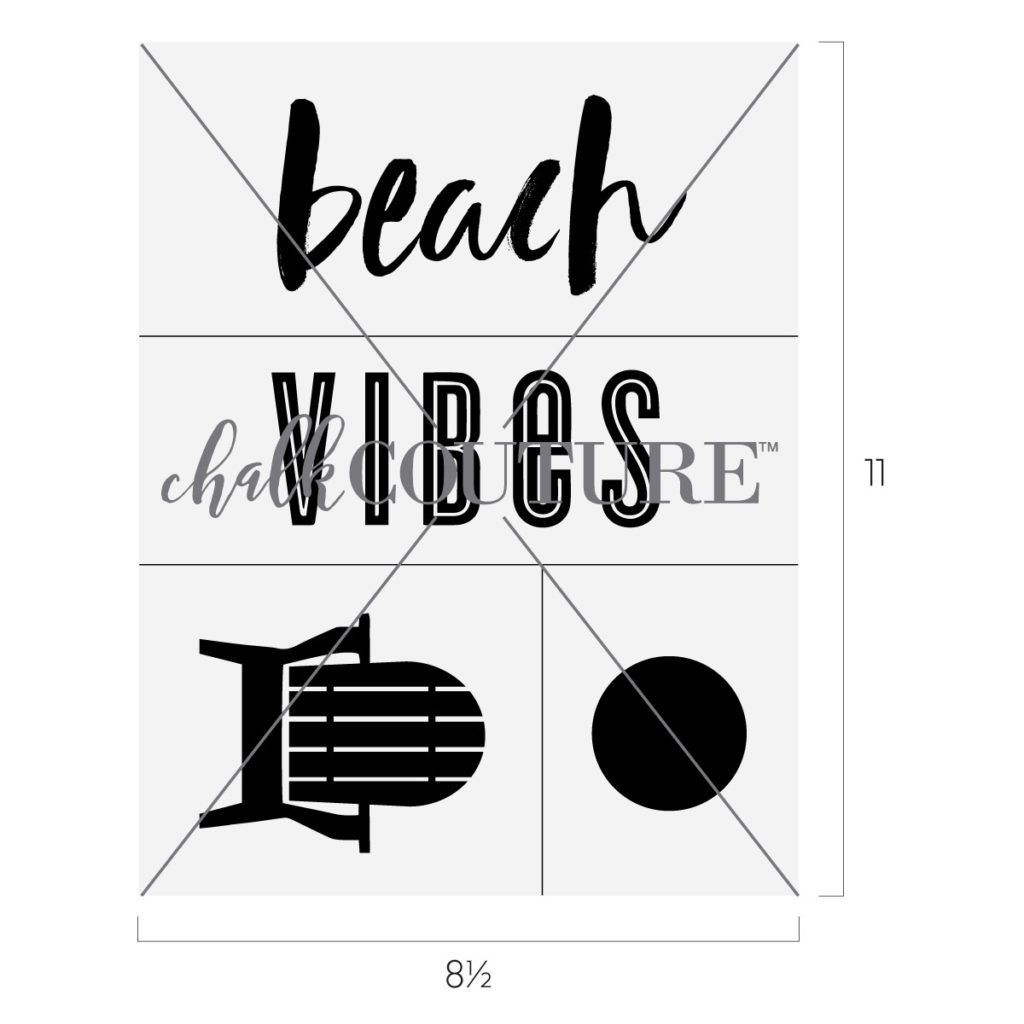
I only used the top portion of the transfer that says "beach". Once cut, I laid the transfer on the block in the middle and pressed to make sure it was adhered. 

I opened the Shimmer Splash Chalk Paste and gave it a good stir with a Stir Stick. I normally add a spray or two of distilled water to make sure its not too dry. I have noticed that most of the shimmer pastes stay well. They don't get many clumps at all.

Once the paste is stirred up well, I take out a small amount with the Stir Stick and put it in the transfer. 


Then I take my Small Squeegee and spread the paste all over the mesh areas. 

Once completed covered in paste. Lift up the transfer from the wood and wash immediately. This will keep your transfers sticky and you can use it many times! 


Look how easy that was! Just imagine what you could make for your home. 


Want to see how I made it? Watch here:

Watch this video and more on my Tik Tok Channel

 Do you make stuff for your home? Let me know! I would love to hear all about it! 

What Is Chalk Couture?: https://youtu.be/nyosBF7gSxo
See how to create with Chalk Couture: https://youtu.be/jHLd2P2zqWo

SAVE 40% OFF EVERYTHING & JOIN MY TEAM AS A DESIGNER: 
What Is In The Kit: https://youtu.be/qiVdqk2RDdw

JOIN MY CLUB COUTURE & GET EXCLUSIVE PERKS: 
EXCLUSIVE DISCOUNT: 25% OFF, Happy Mail, Exclusive Lives, Art Giveaways, and other benefits


Like these but not sure what Chalk Couture is- Click here to read all about it! 

Wanna shop for some Chalk Couture stuff? Click here to check out all the amazing items! 


And as always, help a sister out by sharing this post, like it and leave me a comment! 

Until then...


Tuesday, June 1, 2021

June 2021 Club Couture - A Beautiful Thing // Come Chalk with Me!

What do you get when you pair a flowy, curvy sentiment with a gentle nod to Scandinavian design elements? You get a beautiful thing that is darn-near perfect! (Because as they say, “a beautiful thing is never perfect.”) Pairing the sentiment with the various cut-apart elements is an easy way to breathe life into this Transfer. We think this looks best with our classic Bright White Chalkology® Paste and the three brightly colored paste singles included with your Club Couture™ shipment: Couture Coral, Daffodil, and Eucalyptus.

The sweet hummingbird and floral accents are great for watercoloring techniques. Chalk the element, then add a bit of water to your paste, mix together, and paint inside the lines with a paintbrush.

We can’t wait to see how you’ll bring this bright and summery design together in all the most perfect ways.

Supplies Included:

-Club Couture Transfer: A Beautiful Thing

-Chalkology® Paste Singles: Couture Coral, Daffodil, Eucalyptus


Supplies Needed

-Surface: Sylvie White Frame (Black, 9" × 12")

-Chalkology Paste : Bright White

-Tools: Small Squeegee
Mini SqueegeeTransfer TrimmersColor TraysFuzzing Cloth


Color and Placement Suggestions

-Bright White: “A beautiful thing is never perfect”

-Couture Coral: Hummingbird, 5-petal flowers

-Daffodil: Round flowers

-Eucalyptus: Greenery


Follow these instructions to complete this project:

1. Remove your Transfer from its packaging. Cut along the Transfer’s provided cut lines to separate the elements.

2. Carefully peel off the Transfer Backer Sheet of the element you’re using first.

3. “Fuzz” the Transfer element by gently pressing onto a Fuzzing Cloth and carefully pulling it upward. This will make the Transfer easier to remove from the surface after you’ve applied the paste.

4. Center the “A beautiful thing is never perfect” element on the surface. Smooth the Transfer out to ensure it has properly adhered and that there are no air bubbles or wrinkles.

5. Knead your Chalkology Paste Singles. Cut open the corner of each packet and squeeze the desired amount of paste onto a Color Tray, using a new tray for each color.

6. Smooth a generous amount of Chalkology Paste over the Transfer using a squeegee (see “Color and Placement Suggestions”).

7. Once the screen portion of the design is completely covered, squeegee the excess paste off as evenly as possible and scrape it back into the tray. The more excess paste you remove, the better the result will be.

8. Before the paste dries, slowly peel back the Transfer. To prevent any stretching in it, peel the Transfer back vertically from two parallel corners, instead of diagonally.

9. Immediately clean the Transfer with cool water and a Board Eraser. Do not leave the Transfer in water or let it soak.

10. Dry the Transfer flat with the sticky side up.

11. Once the chalked sections are dry, repeat steps 2–10 for the hummingbird, floral, and greenery elements (see “Color and Placement Suggestions”). Let each layer of paste dry completely before adding additional paste layers.

12. Once all Transfer elements are washed and dried, reapply the Backer Sheet to each and store them flat.

13. Relish your creation and embrace the beauty of homemade projects!


Want to see a quick Video on how it is done? 

Watch this:


Not a Club Member yet?

Love your Club Couture membership, but want more to use them on? Get a Best Basics Chalk It Up Kit

Our basic instructions go like this: choose a surface and Transfer, add some paste or ink, and start creating. With the Best Basics Chalk It Up Kit, you’ll have what you need to carry out those instructions and you’ll be well on your way to artistry!

This kit includes two of our favorite surfaces: Board & Base (perfect for A-sized Transfers) and a Sylvie White Frame (perfect for B-sized Transfers). Both surfaces are reusable with Chalkology Paste, and can be used in either landscape or portrait orientation. Plus, that Board & Base is reversible so you can have two projects to display all at once!


There is no point in trying to be perfect, 
look for the beauty all around and you will find perfection in itself!  

 Do you make stuff for your home? Let me know! I would love to hear all about it! 

What Is Chalk Couture?: https://youtu.be/nyosBF7gSxo
See how to create with Chalk Couture: https://youtu.be/jHLd2P2zqWo

SAVE 40% OFF EVERYTHING & JOIN MY TEAM AS A DESIGNER: 
What Is In The Kit: https://youtu.be/qiVdqk2RDdw

JOIN MY CLUB COUTURE & GET EXCLUSIVE PERKS: 
EXCLUSIVE DISCOUNT: 25% OFF, Happy Mail, Exclusive Lives, Art Giveaways, and other benefits


Like these but not sure what Chalk Couture is- Click here to read all about it! 


Wanna shop for some Chalk Couture stuff? Click here to check out all the amazing items! 


And as always, help a sister out by sharing this post, like it and leave me a comment! 

Until then...

Tuesday, May 11, 2021

My take on May's Club Couture - Sweet Lemon Grove // Come chalk with me!

I absolutely loved this months Club Couture transfer! It's just perfect for spring and summer time! With a few different added in options, you could make this transfer in so many ways! 

You could place it in the kitchen and make a Lemon Drop! Sounds yummy! 


Ready to see how I made it? 

Step 1: Grab all your supplies that you will need. This makes it so much easier so you don't have to get up while chalking. I didn't use the trays since I have the jars of each chalk paste. Always stir your paste colors before you use them. If they feel a little dry, add a little bit of distilled water to it and stir well. 

Step 2: I used the main part of the transfer so I cut off the extra 2 pieces off. 

Step 3: Time to Fuzz Fuzz FUZZ! These newer transfers seem really sticky so fuzz it well so it doesn't stick too much to the surface. 


Step 4: Lay your transfer down onto your surface. Make sure its completely flat. 

Step 5: Make a game plan of where you want your paste colors to go. I went by the instructions and used the Storm Paste for the letters, the Lemon in Bumblebee Paste and the leaves and accent pieces in Meadow PasteI used the Small Squeegees for each paste color. Have your pastes close to you for easy use. 

Step 6: I started from the top and worked my way down. Once I chalked everything from the GROVE up, I used the paste and pull method. Thats when you lift up the portion of the transfer, so the paste doesn't dry out and mess up when you wait till the end to lift up the transfer. I laid the transfer back down carefully. I also pasted a little thick to give myself a little extra time. Then removed the extra paste right before I used the paste and pull method. 

Step 7: Lift up transfer and wash it off. The faster you wash it, the cleaner it will be. Use the Board Eraser to get it really clean, really easy. Its a great tool! After washing, lay it upside down so it can dry and you can put on the backing. These transfers are meant to be used 8-12 times each! But I have heard of people using them way more than that! Now clean your tools. During the chalking, I will wipe them will baby wipes, but when I am done, I just put them in a mason jar filled will water. These are easy to clean too. I've never even needed soap to clean them. 

Step 8: Display your awesome chalk art!

Here's a video on how I made it:

What Paste colors could you choose? There are so many options, the outcome possibilities are unlimited! 

What do you want to make your lemons into? 
A Lemon Drop sounds perfect to me!     

 Do you make stuff for your home? Let me know! I would love to hear all about it! 

What Is Chalk Couture?: https://youtu.be/nyosBF7gSxo
See how to create with Chalk Couture: https://youtu.be/jHLd2P2zqWo

SAVE 40% OFF EVERYTHING & JOIN MY TEAM AS A DESIGNER: 
What Is In The Kit: https://youtu.be/qiVdqk2RDdw

JOIN MY CLUB COUTURE & GET EXCLUSIVE PERKS: 
EXCLUSIVE DISCOUNT: 25% OFF, Happy Mail, Exclusive Lives, Art Giveaways, and other benefits


Like these but not sure what Chalk Couture is- Click here to read all about it! 


Wanna shop for some Chalk Couture stuff? Click here to check out all the amazing items! 


And as always, help a sister out by sharing this post, like it and leave me a comment! 

Until then...


Saturday, May 1, 2021

May 2021 Club Couture - Sweet Lemon Grove // Come chalk with me!

 We’ve designed this one as a beautiful statement all on its own, but don’t be afraid to pull out the bits and pieces and create something new. You want a 5” x 5” Double-Sided Box Frame (item S203104) with just the lemon and leaves on it? Make it! You want to build a statement that says, “Home. Where troubles melt like lemon drops”? Do it! You want a gorgeous Reclaimed Metal Tray (item S193118) with the full, large “GROVE” design? You’ll love it! You want to chalk a Tag Mini (item S194121) with the phrase, “Squeeze the day”? You can do it! You want a sassy little dance-inspired piece that says “Sweet GROOVE”? We’re sure you could make that happen with just a bit of finagling.

What we’re saying is that when Chalk CoutureTM gives you lemons, you can make some pretty sweet lemon-themed projects!

These are just a few of our ideas. We can’t wait to see what you’ll create; we’re certain your designs are going to be so sweet.


Supplies Needed

Club Couture Transfer: Sweet Lemon Grove
Surface: Reclaimed Metal Tray (White, 9" x 12")


Chalkology Paste Singles: Bumblebee, Meadow & Storm

Tools: Mini SqueegeeTransfer TrimmersColor TraysFuzzing Cloth

Color and Placement Suggestions
Bumblebee: Lemon
Meadow: Leaves, lines, and banner outline
Storm: All text


Follow these instructions to complete this project:

1. Remove your Transfer from its packaging.

2. Cut along the Transfer’s provided cut lines to separate the elements. Use a marker to label each element’s Backer Sheet to make cleanup easier when matching it to its coordinating Transfer element.

3. Carefully peel off the Transfer Backer Sheet of the largest element.

4. “Fuzz” the Transfer element by gently pressing onto a Fuzzing Cloth and carefully pulling it upward to collect a bit of lint (this helps to more easily remove the Transfer from the surface after you’ve applied the paste). You may repeat this a few times if your Transfer seems extra sticky.

5. Position your Transfer on the surface. Smooth out the Transfer to adhere, ensuring there are no bubbles or wrinkles.

6. Knead each Chalkology Paste Single, cut or tear open the top, and squeeze the desired amount onto a Color Tray, using a new tray for each color.

7. Use a small amount of paste on your squeegee to smooth it over the Transfer, beginning at the top (see “Color and Placement Suggestions”).

8. As you are working through each detail and color, squeegee
the excess paste off as evenly as possible and scrape it back into the tray. The more excess paste you remove, the better the result will be.

9. For best results, use the chalk-and-pull method: Chalk approximately the top third of the Transfer (see “Color and Placement Suggestions”). Before the paste dries, pull back the chalked section of the Transfer, leaving the rest of the Transfer adhered to the surface. To prevent any stretching in the Transfer, peel from the center or from both corners, instead of peeling diagonally.

10. Let the chalk paste air dry (or use our Quick Dry Tool). Gently lay the Transfer back down over the chalked section. Ensure that the next section is fully adhered, and repeat these steps for the middle portion and the bottom third of the Transfer.

11. Remove your Transfer from the surface and immediately clean the Transfer with cool water (do not let it soak).

12. Dry the Transfer flat with the sticky side up.

13. Once the Transfer is washed and dried, reapply the Transfer Backer Sheet and store flat.

14. Relish your creation!

Want to see a quick Video on how it is done? 

Watch this:


Not a Club Member yet?

Love your Club Couture membership, but want more to use them on? Get a Best Basics Chalk It Up Kit

Our basic instructions go like this: choose a surface and Transfer, add some paste or ink, and start creating. With the Best Basics Chalk It Up Kit, you’ll have what you need to carry out those instructions and you’ll be well on your way to artistry!

This kit includes two of our favorite surfaces: Board & Base (perfect for A-sized Transfers) and a Sylvie White Frame (perfect for B-sized Transfers). Both surfaces are reusable with Chalkology Paste, and can be used in either landscape or portrait orientation. Plus, that Board & Base is reversible so you can have two projects to display all at once!


What do you want to make your lemons into? 
A Lemon Drop sounds perfect to me!     

 Do you make stuff for your home? Let me know! I would love to hear all about it! 

What Is Chalk Couture?: https://youtu.be/nyosBF7gSxo
See how to create with Chalk Couture: https://youtu.be/jHLd2P2zqWo

SAVE 40% OFF EVERYTHING & JOIN MY TEAM AS A DESIGNER: 
What Is In The Kit: https://youtu.be/qiVdqk2RDdw

JOIN MY CLUB COUTURE & GET EXCLUSIVE PERKS: 
EXCLUSIVE DISCOUNT: 25% OFF, Happy Mail, Exclusive Lives, Art Giveaways, and other benefits


Like these but not sure what Chalk Couture is- Click here to read all about it! 


Wanna shop for some Chalk Couture stuff? Click here to check out all the amazing items! 


And as always, help a sister out by sharing this post, like it and leave me a comment! 

Until then...


Google Analytics

AUTO ADS BODY