Showing posts with label shop small. Show all posts

Wednesday, July 15, 2020

6 new Try-Me Kits added! Check them out!


Yes... 6! Crazy right?!? And these 6 join the already 3 Try-Me Kits that we already carry. So that's 9 kits in total! What to know something even better--- they are 20% off retail! Try-Me kits are the perfect ensemble. You can easily create a beautiful project using our unique, inspirational products! We’ve reserved them as special offers to customers (not included in the catalog). The Try-Me Kits included in the Autumn/Winter lineup include:


Kindness - Z203122B - $19.38 USD

Few things are always in style, and Kindness is definitely one of them! 

Includes:

  • Chalk TransferTM - Kindness Is Always in Style (A-sized, 5" × 7")
  • Surface - Couture BoutiqueTM Board & Base (5" × 7", original stain color until inventory is depleted) 
  • ChalkologyTM Paste Singles (.19 US fl. oz.) - Couture Coral, Bright White
  • Tool - Mini Squeegee


Live in the Moment - Z203123B - $19.38 USD

Life is made up of moments and living in this moment is one of the best things you can do. 

Includes:

  • Chalk Transfer - Live in the Moment (A-sized, 5" × 7")
  • Surface - Couture Boutique Board & Base (5" × 7", original stain color until inventory is depleted) 
  • Chalkology Paste Singles (.19 US fl. oz.) - Couture Coral, Bright White
  • Tool - Mini Squeegee


Life is Good - Z203124B - $20.98 USD

Collect the happy times and keep them close to your heart, then cherish each one! That makes a good life for sure!

Includes:

  • Chalk Transfer - Life is Good (A-sized, 5" × 7")
  • Surface - Pallet Sign (5" × 7")
  • Chalkology Paste Singles (.19 US fl. oz.) - Eucalyptus, Ocean Mist 
  • Tool - Mini Squeegee


Autumn Skies - Z203125B - $21.65 USD

“Pumpkin everything” is on the way! Bring Autumn home with country warmth.   

Includes:

  • Chalk Transfer - Autumn Skies (A-sized, 5" × 7")
  • Surface - Pallet Sign (5" × 7")
  • Chalkology Paste Singles (.19 US fl. oz.) - Black Velvet, Shimmer Copper 
  • Tool - Mini Squeegee


Believe in Yourself - Z203126B - $20.98 USD

Believe in the bold, brilliant, beautiful you! The sky’s the limit!

Includes:

  • Chalk Transfer - Believe in Yourself (A-sized, 5" × 7")
  • Surface - Double-Sided Box Frame (5" × 7")
  • Chalkology Paste Singles (.19 US fl. oz.) - Eucalyptus, Ocean Mist 
  • Tool - Mini Squeegee


Loveliest Smile - Z203127B - $21.65 USD

Autumn is a festival for the eyes, a wind-kissed cheek, and the year’s last, loveliest smile. 

Includes:

  • Chalk Transfer - Loveliest Smile (A-sized, 5" × 7")
  • Surface - Double-Sided Box Frame (5" × 7")
  • Chalkology Paste Singles (.19 US fl. oz.) - Black Velvet, Shimmer Copper 
  • Tool - Mini Squeegee

Want to read about the original Try me kits? Check them out and see which one you would want to try!

Which Try-Me Kit is your favorite? Let me know in the comments!! 


Like these but not sure what Chalk Couture is- Click here to read all about it! 


Wanna shop for some Chalk Couture stuff? Click here to check out all the amazing items! 

And as always, help a sister out by sharing this post, like it and leave me a comment! 

Until then...

Sara ;) 


Saturday, July 11, 2020

My take on the July Club Couture - Let's Get Lost


I LOVE the July Club Couture transfer! It has a little of a vintage flair.  This is a really easy one since I only used 2 paste colors.  When I joined Chalk Couture as a Designer, I got this great 9 x 12 framed chalkboard called the Couture Gallery Aiden Style White Frame that I have used for almost all of my Club Couture Transfers. They fit perfect and I love the frame on it. It gives it a farmhouse feel. Let me show you how I styled mine. 


Supplies needed: 


Step 1: Get your accessories all together so you are not stopping mid way to grab something. This is the time to pick your paste colors and stir them well. Always stir your paste colors before you use them. If they fell a little dry, add a little bit of distilled water to it and stir well. I picked Couture Teal and Shimmer Gold pastes. The Shimmer gold is an amazing color and the pictures on the Chalk Couture site don't do it justice! 


Step 2: Take your transfer out of the plastic covering and fuzz fuzz fuzz that transfer! 


Step 3: Lay your transfer down onto your surface. Make sure its completely flat. 


Step 4: Make a game plan of where you want your paste colors to go. I wanted the globe part to be in the Couture Teal color and the stand to be in the Shimmer Gold color. Now you can start chalking! I used the Small Squeegee on most of the globe part and the Multi-Tool to use when I got close to the stand. When chalking the stand, I used the Multi-Tool the whole time. The Multi-Tool has 2 sides to chalk small areas with ease.  


Step 5: Lift up transfer and wash it off. The faster you wash it, the cleaner it will be. Use the Board Eraser to get it really clean, really easy. Its a great tool! After washing, lay it upside down so it can dry and you can put on the backing. These transfers are meant to be used 8-12 times each! But I have heard of people using them way more than that! Now clean your tools. During the chalking, I will wipe them will baby wipes, but when I am done, I just put them in a mason jar filled will water. These are easy to clean too. I've never even needed soap to clean them. 


Step 6: Display your awesome chalk art! I love these 2 paste colors together! 

What Paste colors could you choose? There are so many options, the outcome possibilities are unlimited! 

Like these but not sure what Chalk Couture is- Click here to read all about it! 

Wanna shop for some Chalk Couture stuff? Click here to check out all the amazing items! 

And as always, help a sister out by sharing this post, like it and leave me a comment! 

Until then...

Sara ;)

Saturday, July 4, 2020

My 4th of July Mantel - Oh how I love you so!


So by now, we all know that I LOVE the 4th of July.... and now with a bigger house, we can decorate more! I'm sure my husband just loves that ;) So I slowly decorated that Mantel thinking that he wouldn't notice. I don't think he minds since he is so patriotic and love the 4th of July as much as I do. 

On my large sign on the left, I found that surface at Hobby Lobby with an orange clearance sticker. I can't even remember what design was on it, but I knew a coat or two of black chalk paint would make it into a great chalking surface. Once done painting it, I picked 2 retired transfers called Freedom and Homespun Stars.  
Retired Freedom Transfer
Homespun Stars
Retired Homespun Stars Transfer
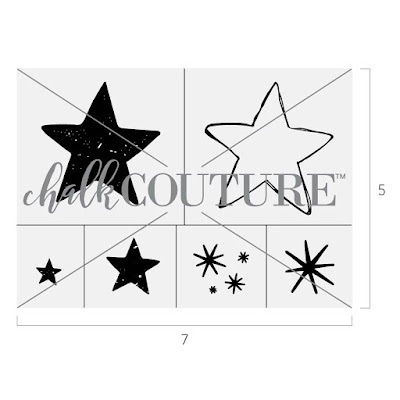
This transfer fit just perfect of this surface! I actually only used the bottom half of the freedom transfer- It's so large that you can cut it into 2 parts. You could really cut it up a lot smaller, but i love the layout that it already has. I cut the Freedom transfer in 2 and laid the bottom half on the lower section of the surface. I stirred all the chalk pastes before starting. I picked Candy Apple, Blue Jay and Bright White for my paste colors. I kind of picked the paste color as I went down the transfer. After each line, I would lift that section and let it dry. The reason is that if you let the chalk dry in the transfer and then try to lift it up, it will lift up the chalk too and mess it all up. After completing the Freedom portion of the transfer, I randomly added the Homespun Stars at the top. My favorite start in the 3 toned star on the left side. 

I really wish these transfer weren't retired! I would have gotten another set!

Do you decorate your Mantel for any holidays? I'd love to hear all about them! Leave me a comment! 


Like these but not sure what Chalk Couture is- Click here to read all about it! 

Wanna shop for some Chalk Couture stuff? Click here to check out all the amazing items! 


And as always, help a sister out by sharing this post, like it and leave me a comment! 

Until then...

Sara ;)

Tuesday, June 30, 2020

July Club Couture - Let’s get Lost


How are we already in July?!? The 1st part of the year was slow as molasses and now we are half way through the year. And maybe we can’t do all the traveling we want but let's find a beautiful place to get lost. This charming, exclusive Transfer is July's Club Couture™ design - Let's Get Lost. Join Club Couture in July and add on this worldly Transfer while supplies last.


Here is the step by step on how to create this months Club Couture:

Supplies Needed
Club Couture Transfer: Let’s Get Lost
Chalkology Paste Singles: Sage, Storm, Morning Sky
Surface: Pallet Board (9" × 12")

Color and Placement for Club Couture
1. Globe: Sage and Morning Sky
2. Stand: Storm

Follow these instructions to complete the Club Couture project:
1. Prepare your Chalk Transfer by removing it from the packaging.
2. When you remove the backer from the Transfer screen, be sure to “fuzz” it to gentle the adhesive by sticking the adhesive screen to a Fuzzing Cloth or terry cloth towel to pick up a bit of lint before applying it to your board.
3. Position the Transfer and smooth to adhere to your surface, ensuring there are no bubbles.
4. Block off the “globe” portion of your design with Placement Tape.
5. Prepare your Chalkology Paste by kneading the packet, trimming off the corner, and squeezing the desired amount onto one of your Color Trays or another palette surface. Stir paste if using 3 US fl. oz. jar.
6. Use two Mini Squeegees to dab generous amounts of Sage and Morning Sky Chalkology Paste on random areas around the globe (see color and placement suggestions).
7. Use the squeegee to blend and smudge the edges of the two colors together as desired.
8. Scrape off excess paste and discard. The more excess paste you remove, the better the result.
9. Use the “chalk-and-pull” method to carefully pull back the top part of the Transfer (with wet paste) before it dries. Carefully lay the Transfer back down on your surface.
10. Remove the Placement Tape.
11. Smooth Storm Chalkology Paste over the stand element, avoiding the freshly chalked globe.
12. Slowly peel back the Transfer before the paste dries and immediately put it in water to clean thoroughly.
13. Once clean, let dry with the sticky side up.
14. Once all the Transfer elements are clean and dry, reapply all backers and store flat.
 
Want to see a video on how it’s done: Click Here!

Love your Club Couture membership, but want more to use them on? Get a Kickstart kit

This kit has everything you need to make starting your creative adventure easy. Grab it now, because it's available at this price only with your initial Club Couture subscription. Small Squeegee Multi-Tool Board Eraser (2-Pack) Chalkology Paste Bright White (3 oz.) Couture Gallery™ Board (9” x 12”) Couture Boutique Board & Base.


Like these but not sure what Chalk Couture is- Click here to read all about it! 


Wanna shop for some Chalk Couture stuff? Click here to check out all the amazing items! 


And as always, help a sister out by sharing this post, like it and leave me a comment! 

Until then...

Sara ;) 

DIY 4th of July Kitchen Towels


One of my favorite holidays is 4th of July! I love to decorate the outside of my house and the inside of my house. I'm always on the look out for great 4th of July decorations, especially at Hobby Lobby, Target and Marshalls. My collection of decoration is growing and i'm ok with that. 

One day while strolling through the dollar section at target, i'm sure with a Starbucks, I saw this set of 2 Kitchen towels. For $3, I couldn't pass it up! They were perfect for the 4th, and I had an idea to use Chalk Couture Ink to add a little extra to them. 

I'll show you how I made them! 

Supplies needed: 
-Kitchen Towels - I got mine in the dollar section- 2 towels for $3!
-Chalk Couture Ink - I used Cadet and Candy Apple 
-Chalk Couture Small Squeegee
-631 Vinyl
-Cutting Machine- I use a Silhouette Machine 
-Transfer tape - I use clear shelf protector for the dollar store! 
-Parchment paper
-Heat Press or Iron

Step 1: Get your towels ready- remove all tags and press them if needed if they are wrinkly. 


Step 2: Choose your designs that you want to add and cut them with your cutting machine. I chose Let Freedom Ring by Dawn Nicole Designs and Retro July 4th by Sophie Gallo. When getting ready to cut your design, you make have to tweak it a bit. With the design - Let Freedom Ring- I had to remove the outer cutting line from the design. I learned this by cutting it and trying to weed it, and figuring it out the hard way. 

Step 3: Reverse weed the design. Once all the weeding is complete, adhere transfer tape on the top on the design. Press it down firmly with your scraper. 


Step 4: Place the design on the towel where you would like it. Press it down firmly with the scraper over and over and over. Start to lift the transfer tape up from the top and carefully pull down, watching out for the small pieces. You may need to take the end of the scraper and hold down the small pieces to keep them from lifting. After you have completely lifted the transfer tape up, I like to place a piece of parchment paper over it and run the scraper over it again just to make sure they all adhere to the towel. Place wash tape around the edge of the design to make sure you don't get ink on the towel. 


Step 5: Time to INK! Grab your ink and open it up. Stir it well. Always stir! Dip your squeegee into the color and run over your design carefully. There is not mesh with this design so you can't be rough with it. 


Step 6: Once you have completely inked your design, remove the washi tape first and then the vinyl from the top and pulling it down. Now take a sharp weeding tool and remove the small pieces that are left behind. 


Step 7: Let it dry or use a dryer to dry it out if you want to use them ASAP. I always let them dry over night. But I did just buy a heat gun so maybe that will change ;) 

Step 8: Once dry, now you heat set them. That way you can wash them and the design won't come off. I use a Cricut Heat Press but you can use an iron if you don't have one. I set my heat press to 300 degrees and set a 30 second time. 


And just in 8 easy steps, you have DIY custom kitchen towels!
 
I paired my kitchen towels with some tea towels that I tye dyed! I love how they came out! 

What would you put on your kitchen towels?  Let me know!  


Like this but not sure what Chalk Couture is?!?- Click here to read all about it! 

Wanna shop for some Chalk Couture stuff? Click here to check out all the amazing items! 

And as always, help a sister out by sharing this post, like it and leave me a comment! 

Until then...

Sara ;) 

Google Analytics

AUTO ADS BODY