

How many plants do you have? Like in your home and not bushes or trees? I only have 1. Yes...1. I don't do well with keeping plants alive. I have tried different flowers and vegetables. But so far I haven't has any luck. A co-worker gave me a Bamboo plant for my birthday this year and I have kept it alive so far.... which reminds me to go water it now. Ok... Now that that is done, It will stay alive a little bit longer.

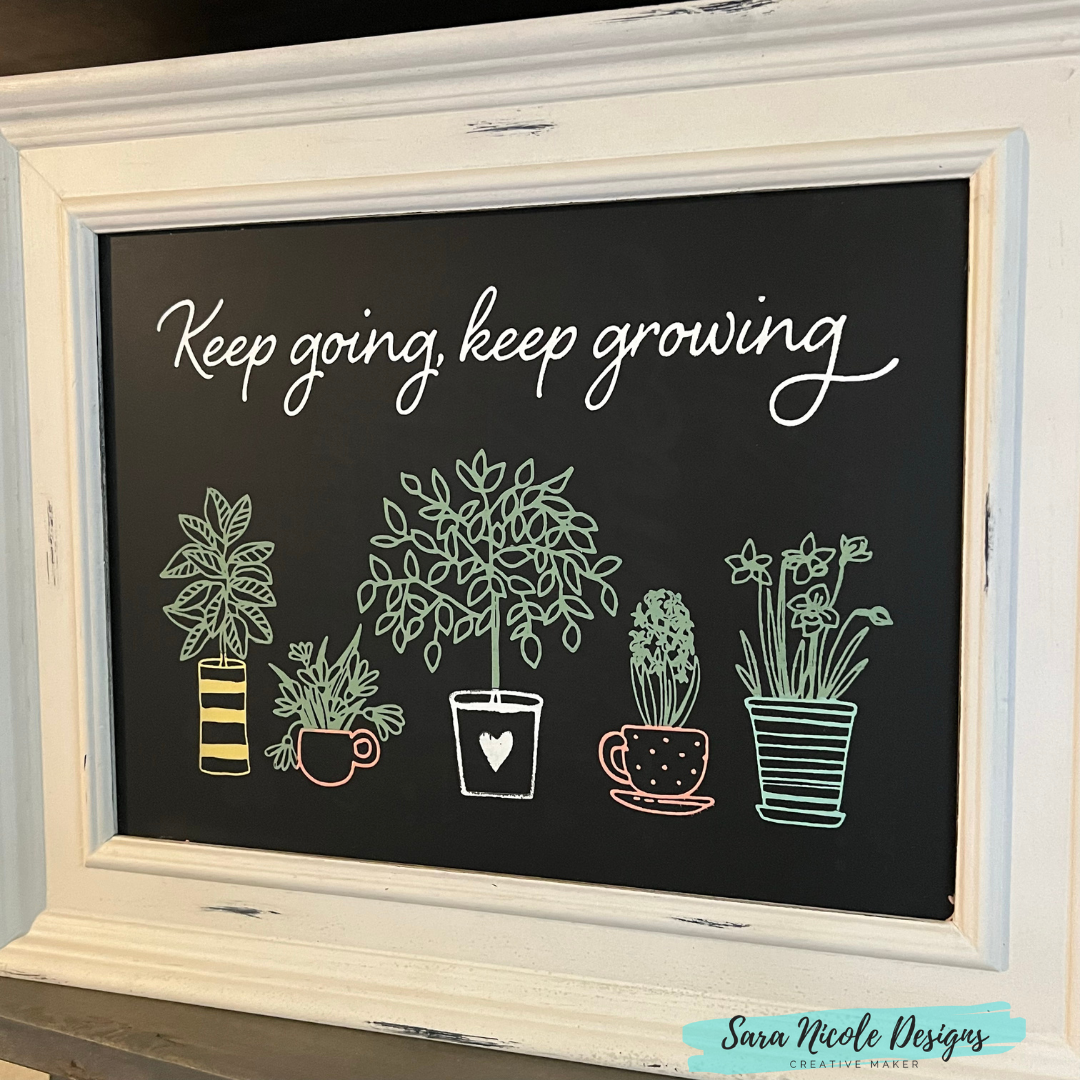
This month's Club Couture was really fun to chalk since I used 5 different Chalk Paste Colors. It took about 7 minutes from start to finish, which is a pretty fast craft. So under 10 minutes with clean up. Just enough time for a busy mom to add a little customer home decor to the house while waiting for dinner to finish.
Come along to watch me make it!
Step 1: Grab all your supplies that you will need. This makes it so much easier so you don't have to get up while chalking. Always stir your paste colors before you use them. If they feel a little dry, add a little bit of distilled water to it and stir well.
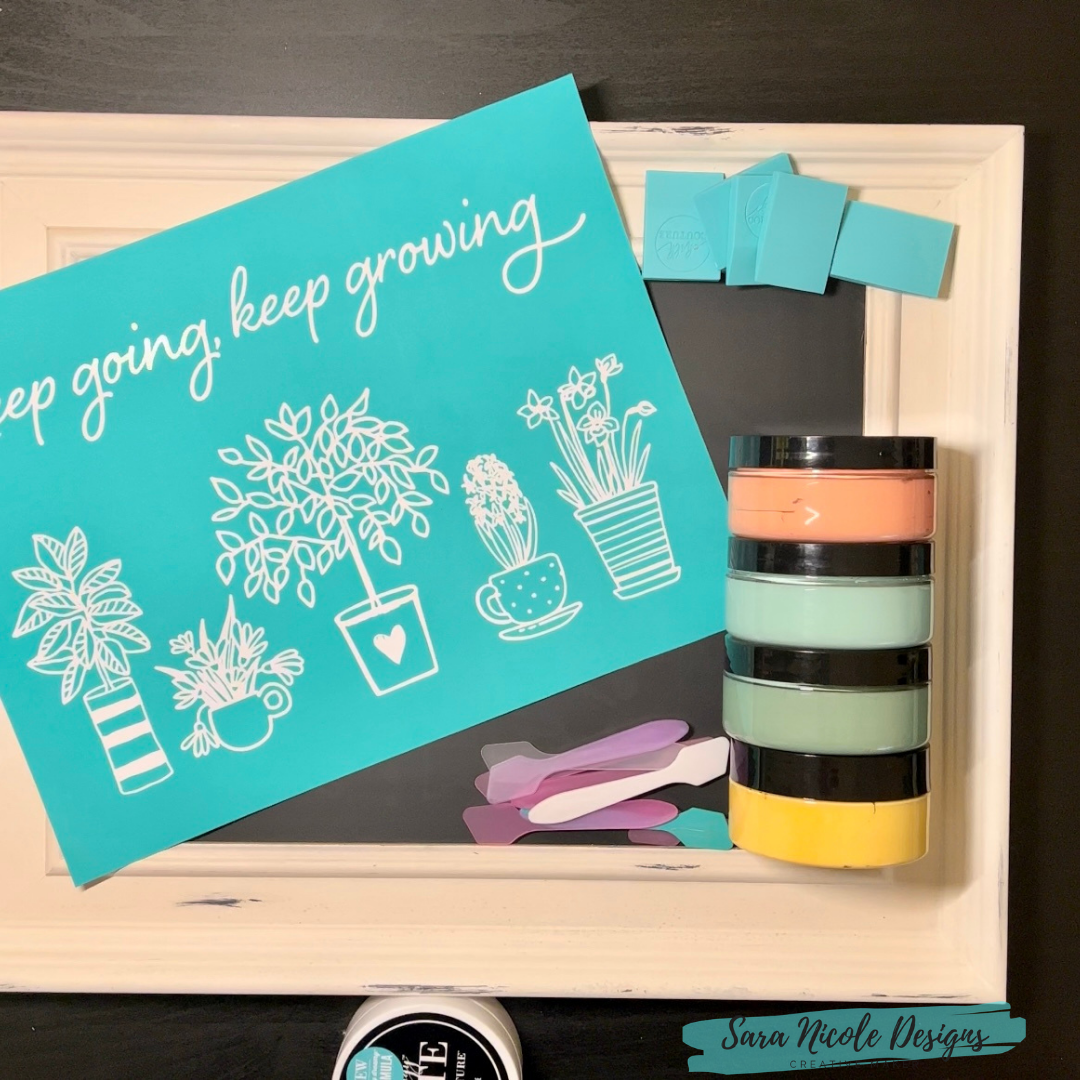

Step 2: Time to Fuzz Fuzz FUZZ! These newer transfers seem really sticky so fuzz it well so it doesn't stick too much to the surface.
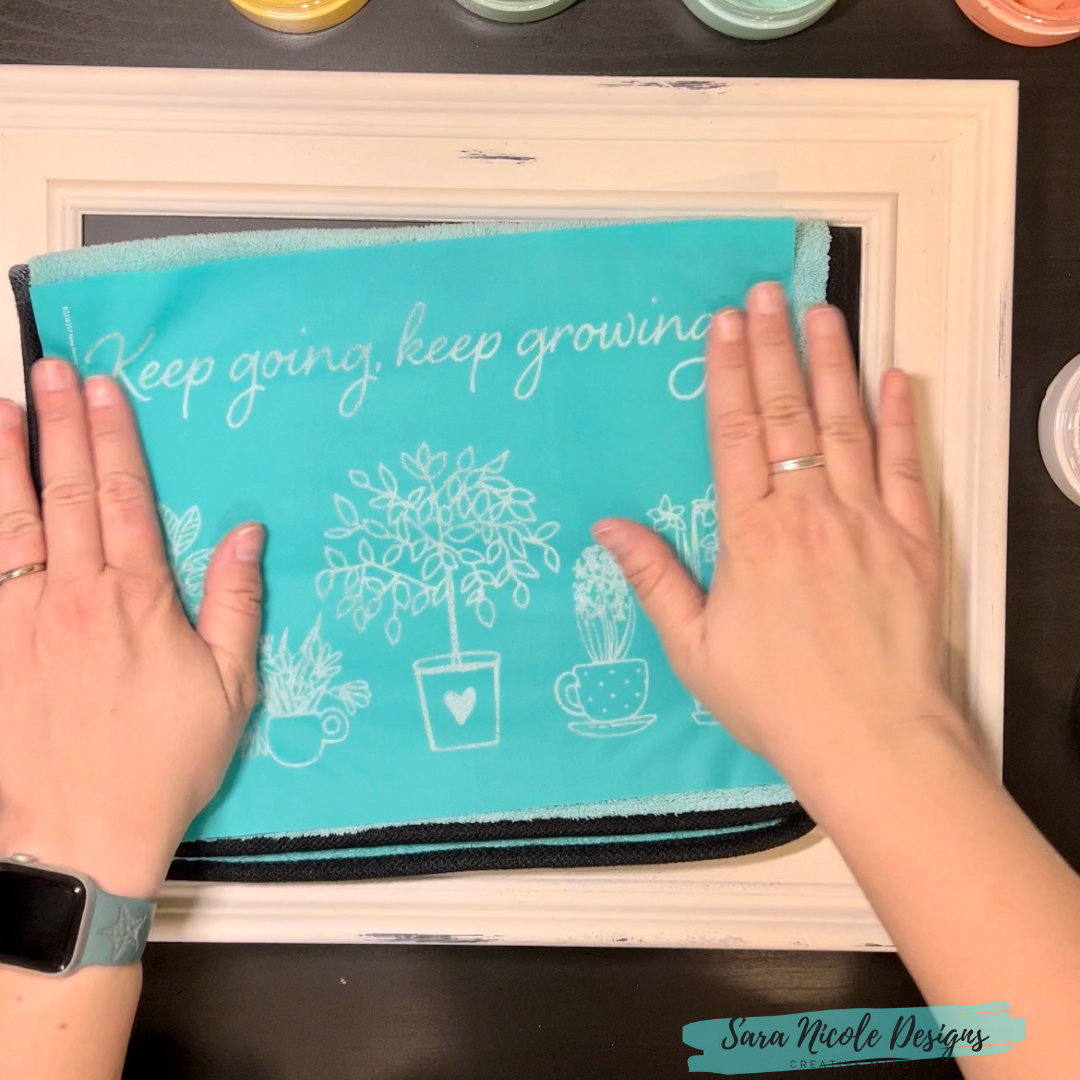

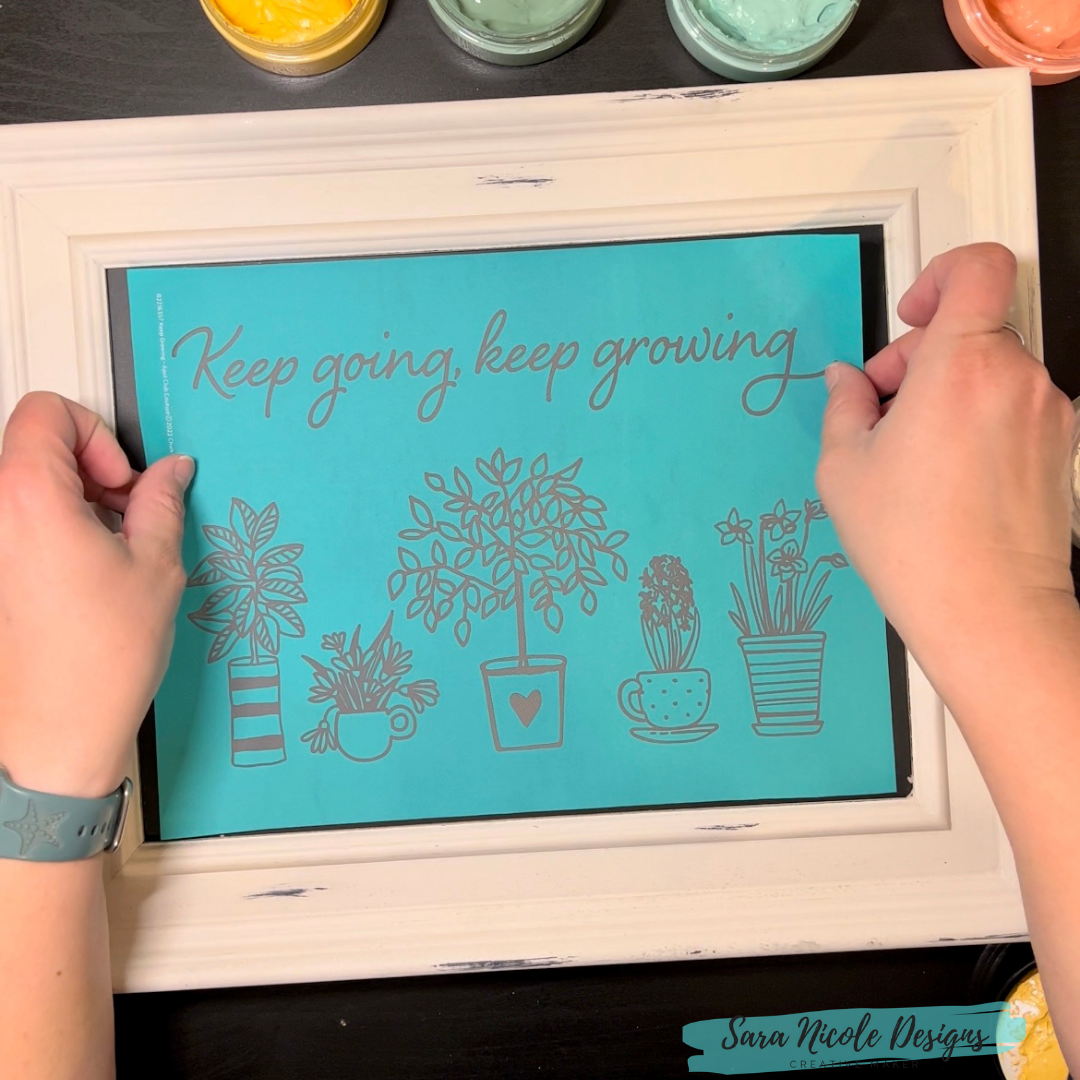
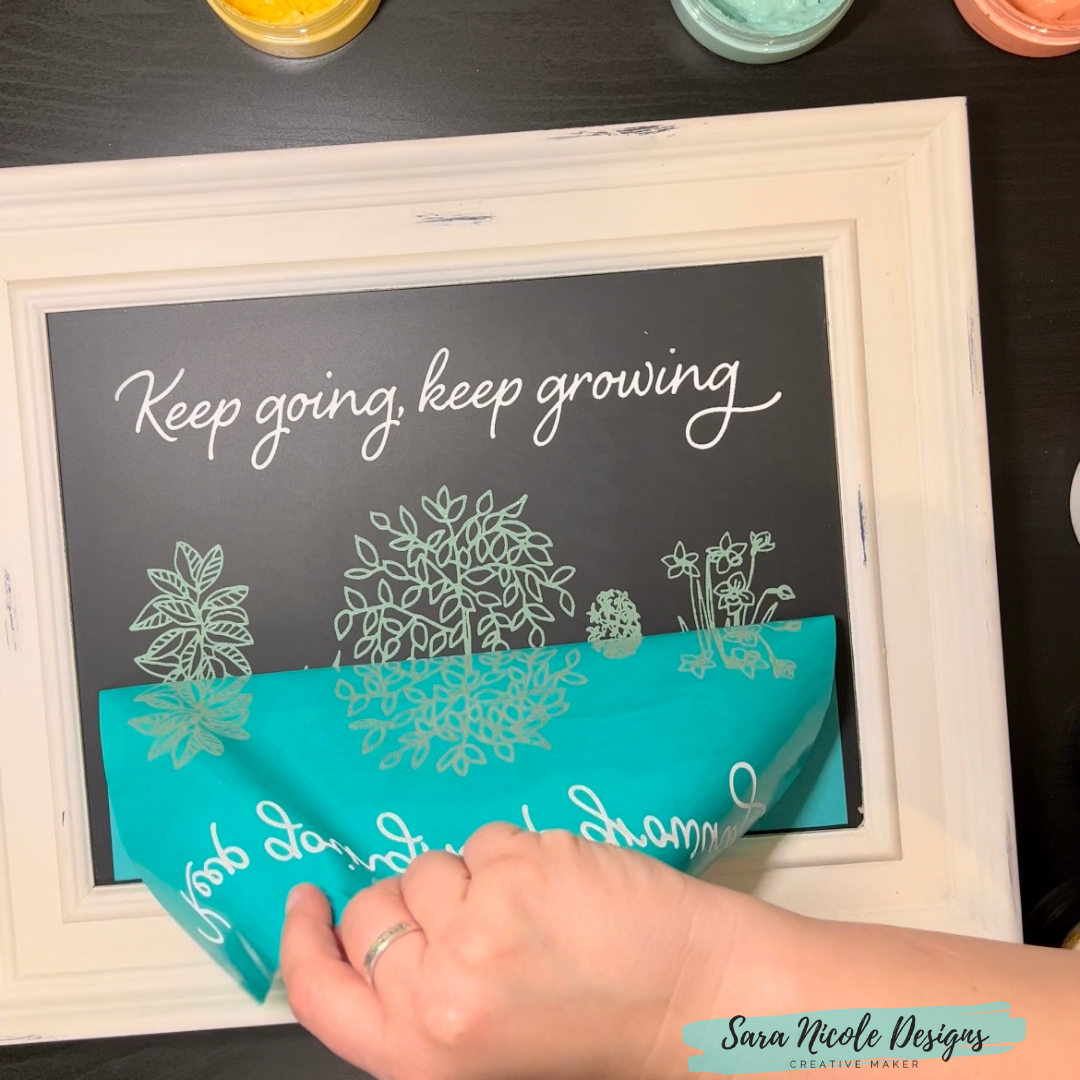
Step 3: Lay your transfer down onto your surface. Make sure it's completely flat.
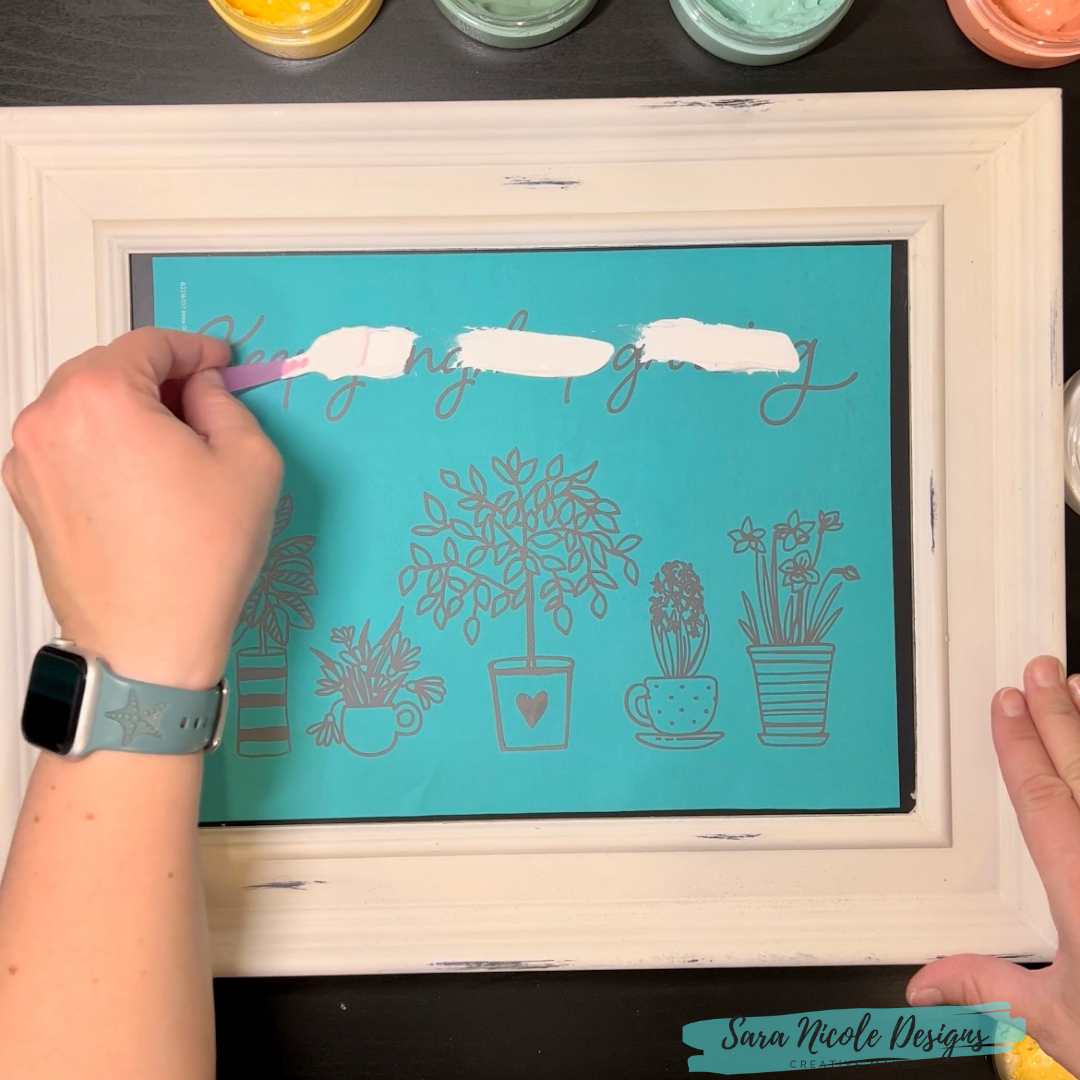
Step 4: I started with Bright White Chalk Paste with the words and the middle planter.

Step 5: Now I grabbed my Jade Chalk Paste to do all of the greenery.

Step 6: Next I went with Sunny Side Chalk Paste for the left planter.

Step 7: At this point, I decided to use the Paste and Pull method. I peeled down the transfer down about half way down. This helps from the paste drying inside the mesh area on the transfer. Once I pulled it down, I used my Quick Dry Tool to dry it before I carefully and lightly laid it back down.


Step 9: Now I grabbed the Seafoam Chalk Paste and chilled the last planter.

Step 10: Lift up transfer and wash it off. The faster you wash it, the cleaner it will be. Use the Board Eraser to get it really clean, really easy. Its a great tool! After washing, lay it upside down so it can dry and you can put on the backing. These transfers are meant to be used 8-12 times each! But I have heard of people using them way more than that! Now clean your tools. During the chalking, I will wipe them will baby wipes, but when I am done, I just put them in a mason jar filled will water. These are easy to clean too. I've never even needed soap to clean them.

I really love how this came out! It goes with everything in my house so I can put it anywhere. It also can be used for a long time since it's not holiday related!


No comments:
Post a Comment